
Screen sharing is not just common nowadays, it is present in many different apps we use. Webinar applications allow presenters to share their screen with the audience, video calling and conferencing apps allow sharing your screen to show other attendees the information you need to share, e-learning is a lot more effective when teachers can see what’s happening with their student’s screen, the list goes on and on. Many modern applications provide the users an opportunity to share their screen, but in order to make sure the users have a great experience in the app, you have to test screen sharing features. In this blog post, we’ll explain how to do that.
How screen sharing works in web applications
In most cases, these video communication applications use WebRTC as their desired communication protocol. This protocol splits each media type into separate tracks, for example, when a participant joins the call, it’s going to have at least two corresponding tracks – one for audio, one for video. When screen-sharing is turned on, two more tracks are created – one for the audio, the other for the video. The newly created tracks aren’t any different from what is regularly made when participants enable a webcam. This means that sharing a screen is almost identical to a new participant joining the call. This allows gathering some metrics that could indicate whether the feature works, and quality was good and stable. Loadero is used a lot for testing audio and video quality in apps that use webcams and microphones, and a similar approach to WebRTC testing can be used to test screen sharing as well.
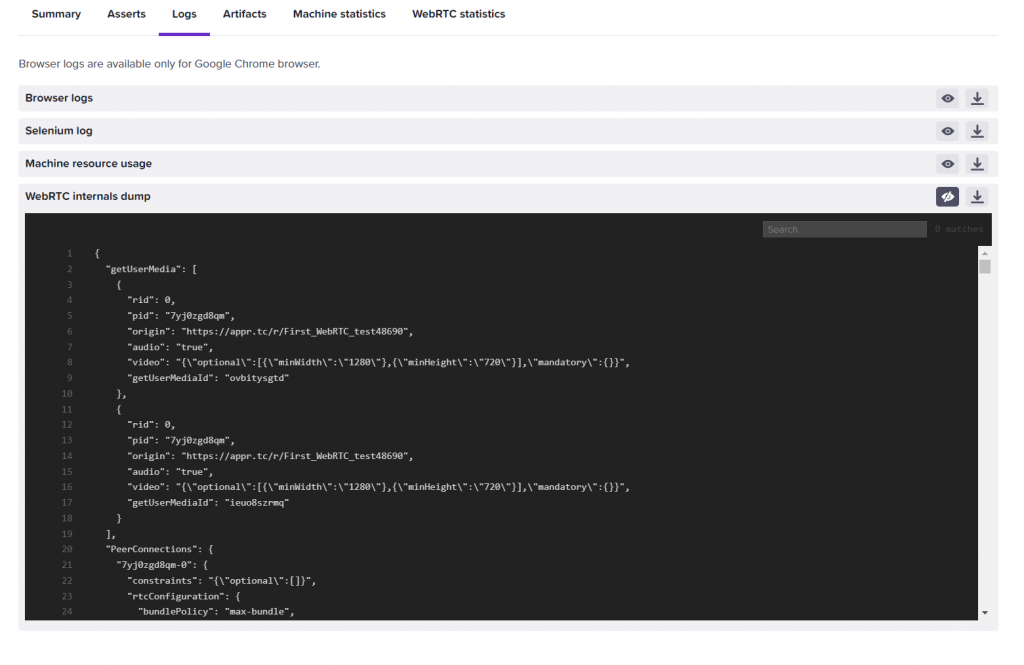
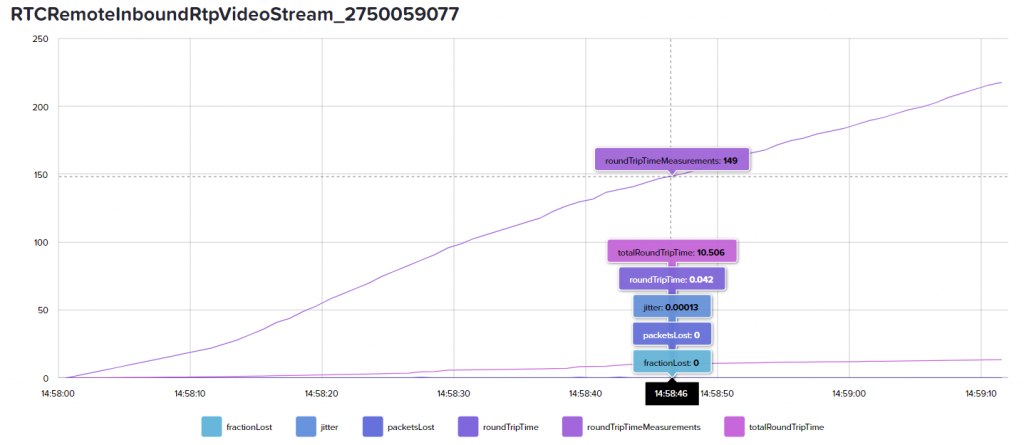
Data for all tracks are saved and can be found in the WebRTC internals dumps that we save for each Loadero participant. While analysis of the internals dump can help understand the performance, our suggestion is to check the graphs we provide first, it’s easier to understand and is less bloated.
Why should one test screen sharing feature
As described before, screen sharing is almost a de facto feature of video communication applications. But if you already tested your application manually and clicking the screen sharing button does exactly what you expected, should you include this feature in your automated load tests? Our answer is – you definitely should. Our approach to load testing and automated testing is to simulate real users’ actions as close as possible to the real world. So if you are working on an application, which allows screen sharing presentations, learning materials, etc., testing the usage of the feature will allow you to validate that screen sharing works fine under a load of high concurrent users, that the user experience and quality of audio and video does not drop when the feature is used, that the resource usage of the feature is reasonable.
How screen sharing impacts machine resource usage
In our own and our client’s tests for video calling apps, we have noticed that screen sharing creates additional strain on the available machine resources. This happens additionally to already resource-demanding environments like 1-on-1 or group video calls. We have tested this theory in the Jitsi meeting call. We ran two participant tests, both participants had 3 CPU cores and 6GB of RAM available. Both participants had their webcameras on, except one of them additionally was screen sharing. We noticed a 10%-20% increase in overall resource usage when screen sharing was enabled.
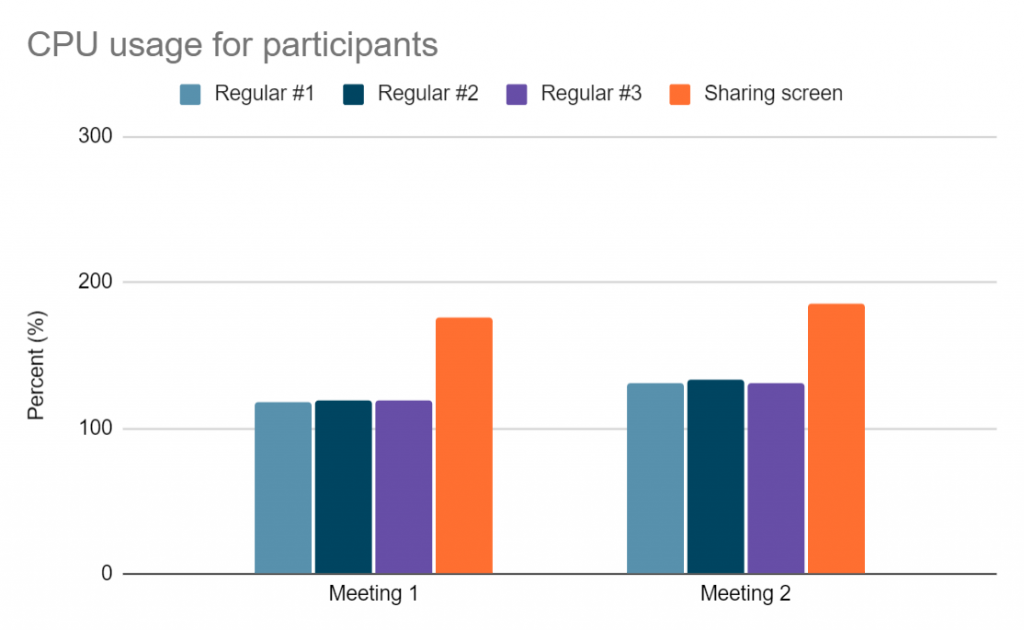
Because of this increase in resource usage, if you’re thinking about enabling screen sharing, we encourage Loadero users to look at the resources that their test use and evaluate – should I increase the compute unit value for participants? If not enough resources are available, the quality of the call can and most likely will be impacted in some way – lower resolution or lagging video. So to get usable data and insightful results from your test, make sure you assigned enough compute power to all the test participants.
How to test screen sharing
Now let’s get to the most exciting part – creating an automated test, which simulates participants joining a group call and one of the participants enabling screen sharing. Let’s go over a scenario and write a small script example for the Jitsi Meet application where we can test the screen sharing feature. Before we start, if this is your first time creating a test in Loadero, make sure to read about the basics of configuring test parameters and test participants here.
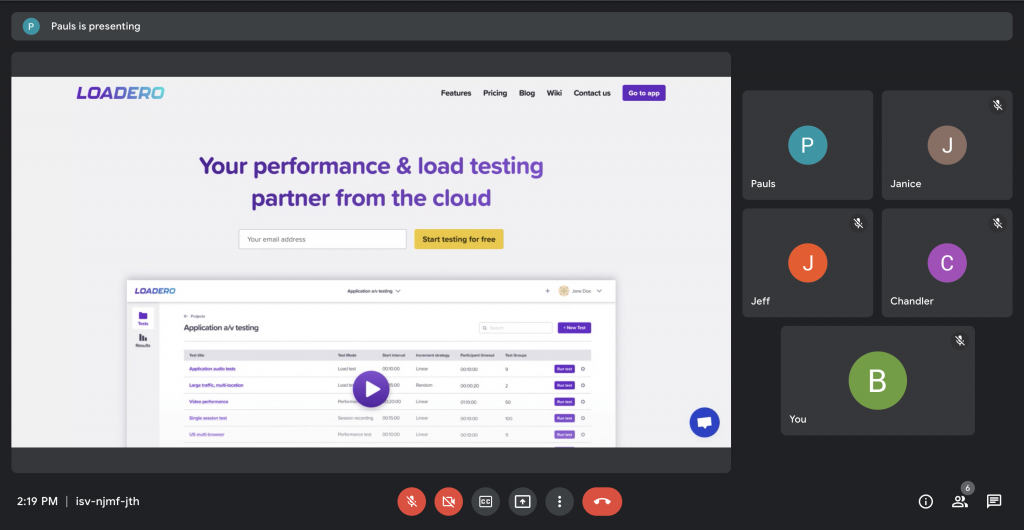
When working on a test in Loadero, all you have to do to enable screen sharing is click the button in the web UI. Similarly, as you simulate other actions in your tests, you’ll have to identify a selector to use with the click command and use the command to simulate one of the participants clicking the share screen button.
The test script we created for this example does the following:
- Participants visit the URL of a Jitsi meeting room
- Participants enter their nicknames and click “Join meeting” button
- One of the participants (the first one in the second group) clicks the button to share the screen
- 1-minute delay
- Each participant takes a screenshot
- 1-minute delay
Tip: Usually only one participant of a call is allowed to share a screen at any moment, so you will likely have to assign the action to only a single participant. To create a test script, in which one participant’s set of actions differs from the others you can follow this guide.
Here is the script we created for the test:
(client) => {
 const callDuration = 120 * 1000;
 const timeout = 30 * 1000;

 client
   .url(`https://meet.jit.si/one-on-one-${client.globals.run.id}`)
   .waitForElementVisible(".field", timeout)
   .setValue(".field", `R${client.globals.run.id}_P${client.globals.participant.id}`)
   .waitForElementVisible('[aria-label="Join meeting"]', 10 * 1000)
   .pause(2 * 1000)
   .click('[aria-label="Join meeting"]')
   .perform(() => {
       if (client.globals.group.id === 1 && client.globals.participant.id === 0) {
           client.click('[aria-label="Start / Stop sharing your screen"]')
       }

   })
   .pause(callDuration / 2)
   .takeScreenshot("WebRTCCall.png")
   .pause(callDuration / 2);
};
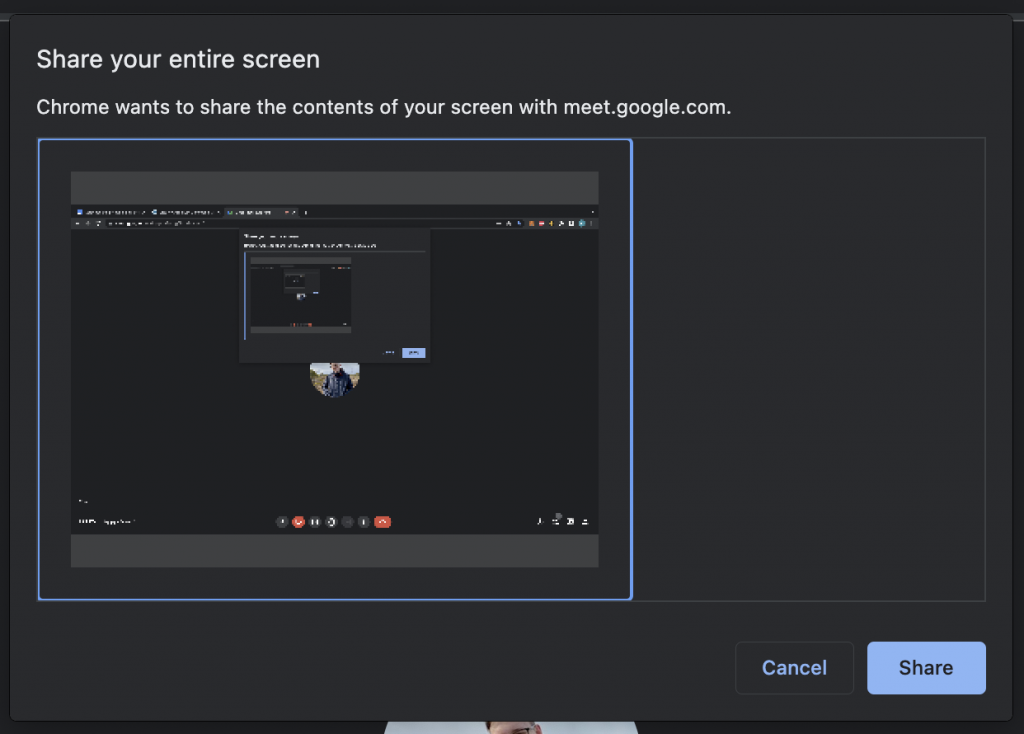
Important: Keep in mind, that the value might change depending on what is the set language in your browser, for the English browser version it’s “Entire screen”.
When you or a test participant clicks on the button to share screen, a pop-up to choose which screen to share will appear. Similarly, browser alerts and other pop-ups, are not intractable as elements, so handling actions to select which screen to share, is not possible from the script side, it has to be pre-selected using automation settings. If you are running your test in Loadero, the option to share the entire screen that the participant sees will be picked automatically, so you don’t need to address this.
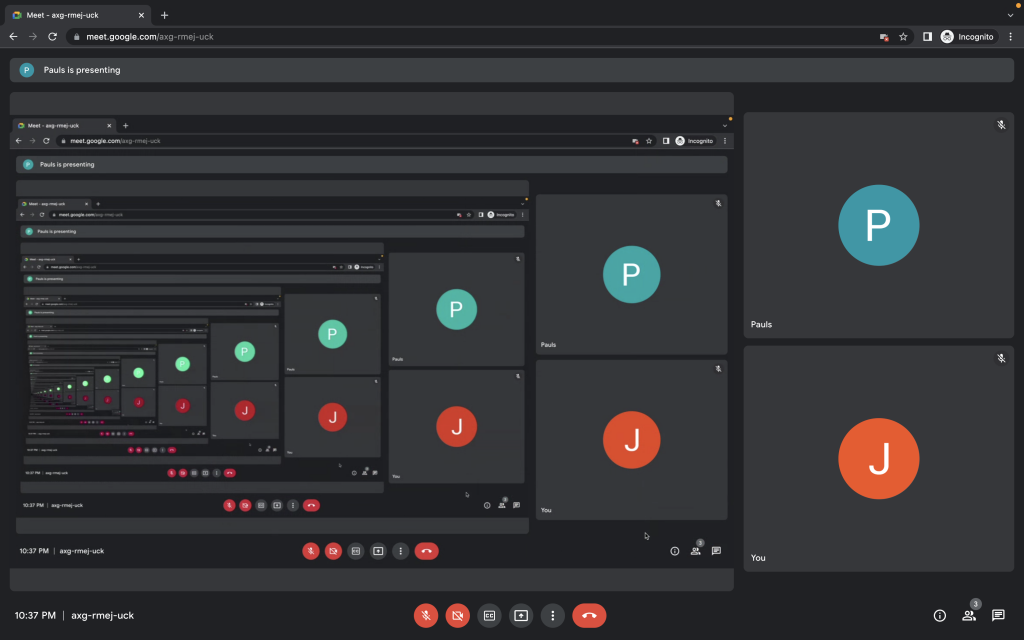
If a user shares their screen and does not navigate to another tab, a lot of times the shared media will essentially be an infinity mirror showing its own desktop in a loop. This should not impact the media quality at all, but it does create an *interesting* view.
If you’re testing locally, you most likely will need to add some fields to your automation settings. Currently, such a thing can be done on Chromium-based browsers using ChromeOptions and Capabilities, so sadly, screen sharing does not work in Mozilla Firefox. For Google Chrome, we opted to use a launch argument that is available and is called “auto-select-desktop-capture-source”, this argument allows providing the name of the capture source which will be automatically selected when the selection window pops up.
auto-select-desktop-capture-source=Entire screen
Tip: For a better understanding and more available launch arguments for Chrome, you can check this list out.
Verifying that screen sharing works in your test
We have created a test, which includes screen sharing in the user flow, but now we have to verify that it works correctly during test runs. One of the easy ways to verify that the screen is shared is by taking a screenshot after the button was clicked. You will be able to find the screenshots in the individual participant results under the Artifacts tab.
Another similar way to make the check is by using the session recording mode. This is a handy way for debugging, that we also use a lot when working on test scripts. Similarly as with the screenshots, you will find the session recording files in the same tab and will be able to watch what the user had on the screen.
More advanced users will be able to also spot which WebRTC tracks are for the shared screen in the WebRTC internals dump or in the graphs we provide. Usually, the same user cannot show their webcam and desktop at the same time, if that is not the case for your application – it might be harder for you to set precise WebRTC assert expected values.
To automatically check if screen sharing was enabled, you can use post-run assertions. One of the assertions Loadero offers for this is the assertion for outgoing video connections. Keep in mind that if only some participants are going to enable sharing assert preconditions should be used. The expected value can change depending on the application, but the minimum usually is 2, which is going to describe the webcam and the shared screen. In some cases when joining a call there is a webcam preview, which can result in an additional “connection”.
We did go over that this media behaves the same as webcam feed, that is why the same principles apply here as well. You can read more about that in our blog post about testing communications platforms under the “WebRTC data analysis” section.
Screen sharing is one of the main features of today’s communication platforms, but is often overlooked and not tested as extensively as other features. If you properly test your product to provide a superb user experience, and it allows screen sharing – make sure to test the feature in your load tests as well.