

Today we will take a look at how easy it is to start using Loadero with a performance testing example. But let’s start with a little explanation on what it is and what does it do?
In short, Loadero is a web application testing tool which provides the ability to run end-to-end tests by simulating thousands of test participants across numerous different locations worldwide. If you need to test how your service works in different browser versions, network conditions and locations or how it operates under high load, Loadero does that and provides detailed result reports. Loadero enables you to create and run tests with Selenium scripts for web applications, while maintaining easy scalability from performance tests to load tests. For more information, visit Loadero.com and our Wiki page.
We will prepare and run a simple performance testing example using Loadero service. To do this yourself, you will need a Loadero account (you can create one, it’s free), and you must be logged in.
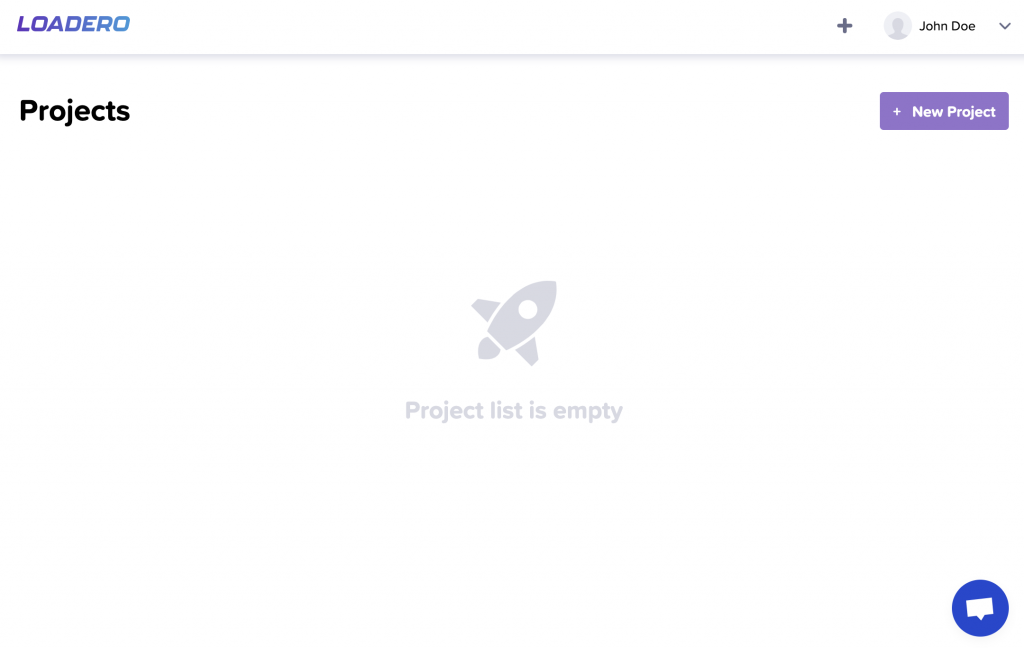
1. Let’s get started – we will be covering all necessary steps one at a time. Right after logging into your Loadero account, you will be greeted with an empty project view. So to move forward, we will create a project which is going to hold our tests for execution. To create a project click – “New Project” button.
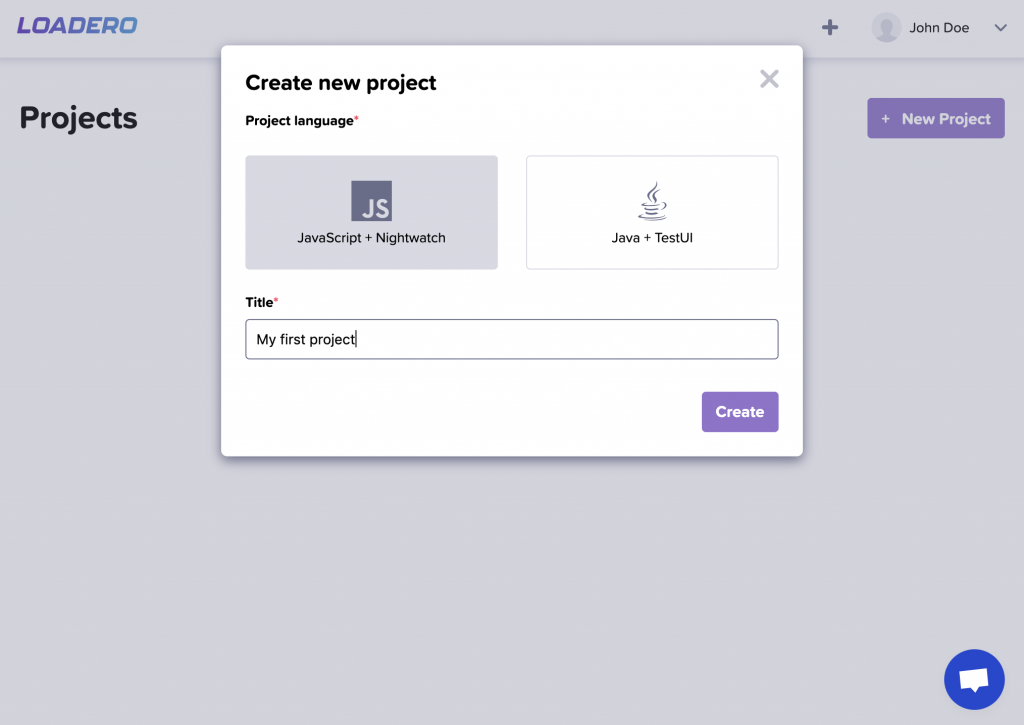
2. After that, a dialog window will appear. It contains two separate fields (Project language and Title) which are required for project creation. For this example, we will choose “Javascript + Nightwatch” as our project language, but there is a recently added “Java + TestUI” scripting language option as well. After choosing your preferred language and name, click – “Create” button. This will create a project for your account, and you will be redirected to the project test view.
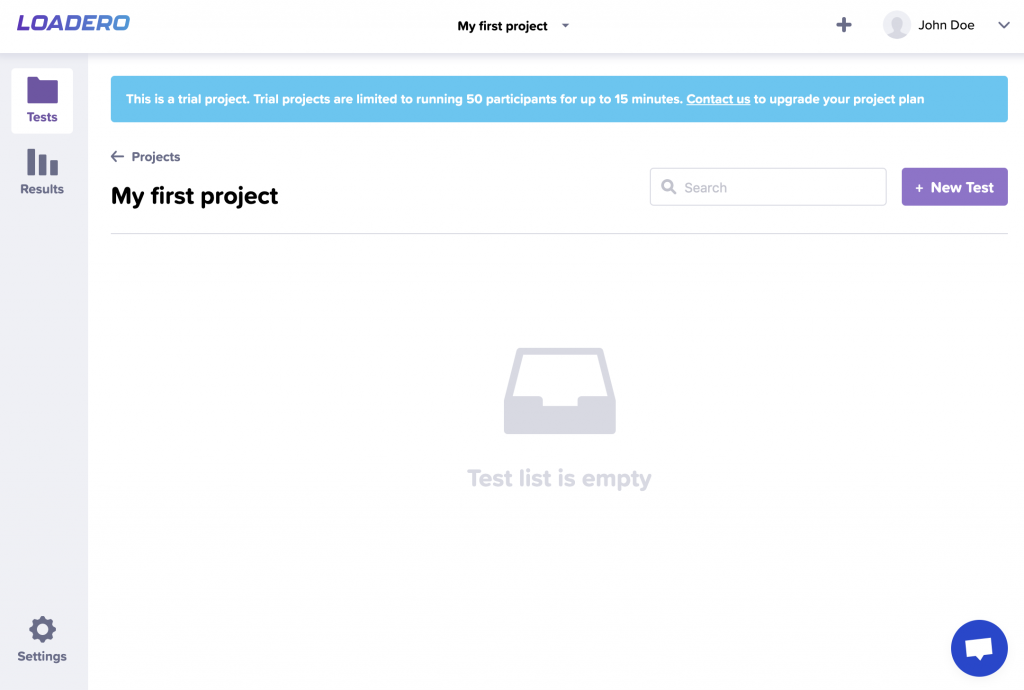
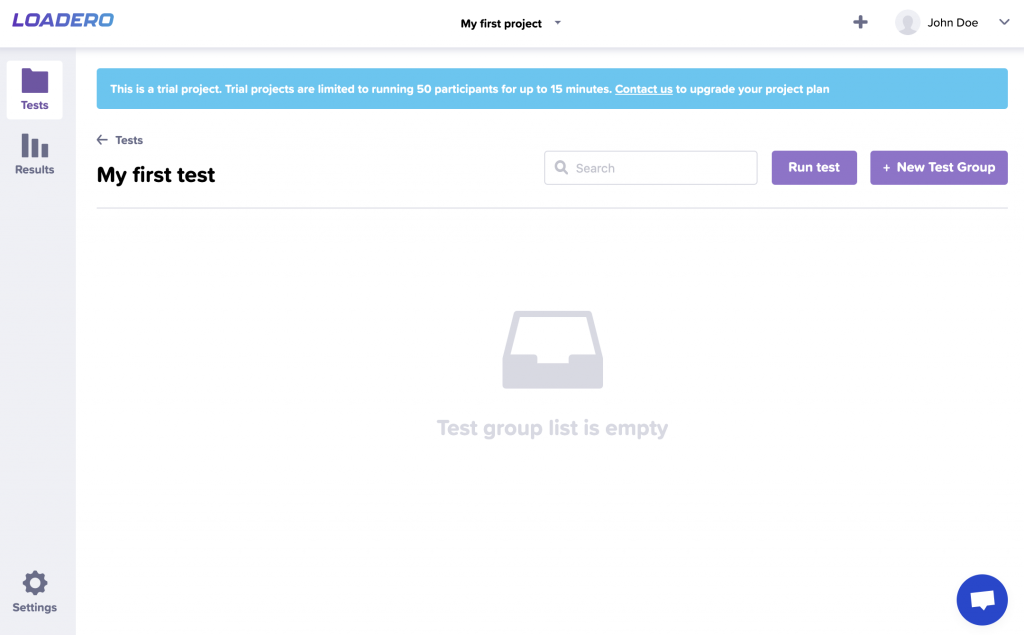
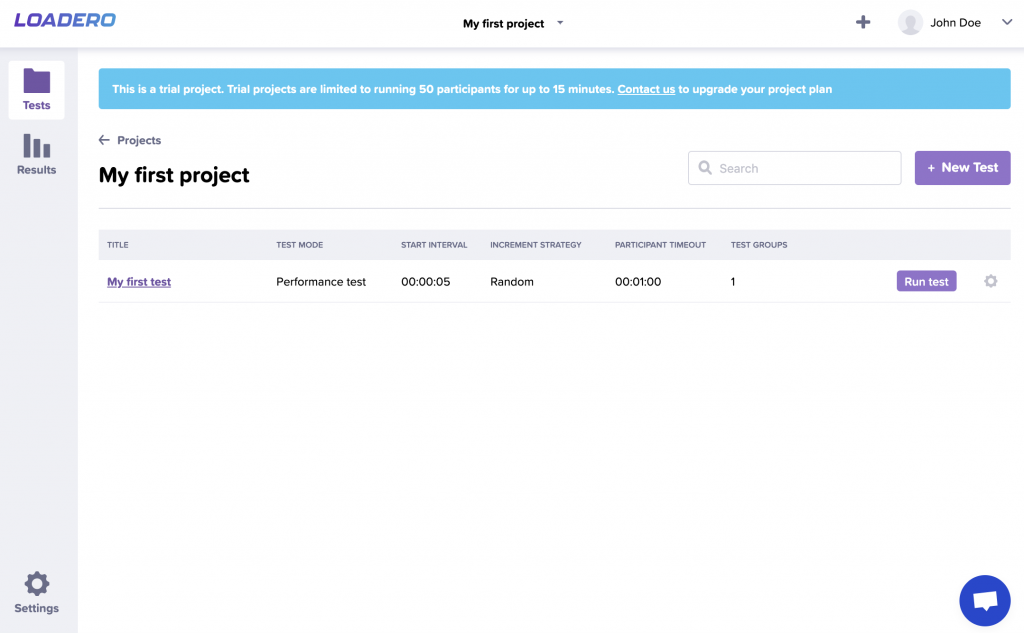
3. The project test view holds all your created tests for that specific project. You can also start and stop a test and see the duration of a test run. As this is a trial project, indicated by the blue banner above, the tests have certain limitations associated with test runs. For more information regarding these limitations, visit the pricing section found here.
Let’s continue by creating our first test by clicking – “New Test” button.
4. After clicking the “New Test” button, we will be redirected to the test creation screen. This view holds several key fields – script, title, test mode, increment strategy, start interval, and participant timeout. More info about these fields can be found on the Loadero wiki page. If you are new to this and need some help with writing test scripts, make sure to read our guide that will help you learn using Nightwatch.
In this performance testing example we will be opening the DuckDuckGo page, and wait until #content_homepage (main app container) element loads as a way to determine that the website is ready to be interactable. Then we will send input to a search field and search for “Nightwatch.js”. And as a next step, we will assert that the first search result title contains “Nightwatch.js”. As the final step, let’s take a screenshot of our result. We will create a performance test with a random participant increment strategy using 5 seconds as the start interval, which means that test participants will join in random order within a 5 second start interval. Also, we specify that the maximum test participant execution time will be 1 minute. After all fields are filled, click – “Create” button.
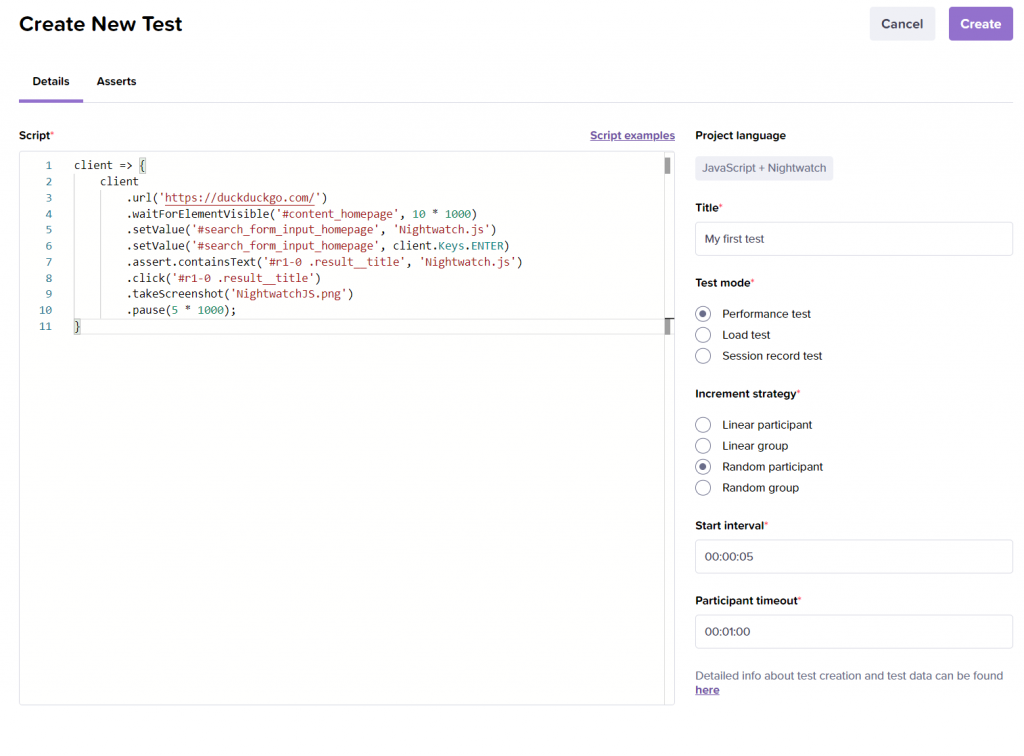
Test script used for our performance testing example:
client => {
    client
        .url('https://duckduckgo.com/')
        .waitForElementVisible('#content_homepage', 10 * 1000)
        .setValue('#search_form_input_homepage', 'Nightwatch.js')
        .setValue('#search_form_input_homepage', client.Keys.ENTER)
        .assert.containsText('#r1-0 .result__title', 'Nightwatch.js')
        .click('#r1-0 .result__title')
        .takeScreenshot('NightwatchJS.png')
        .pause(5 * 1000);
}
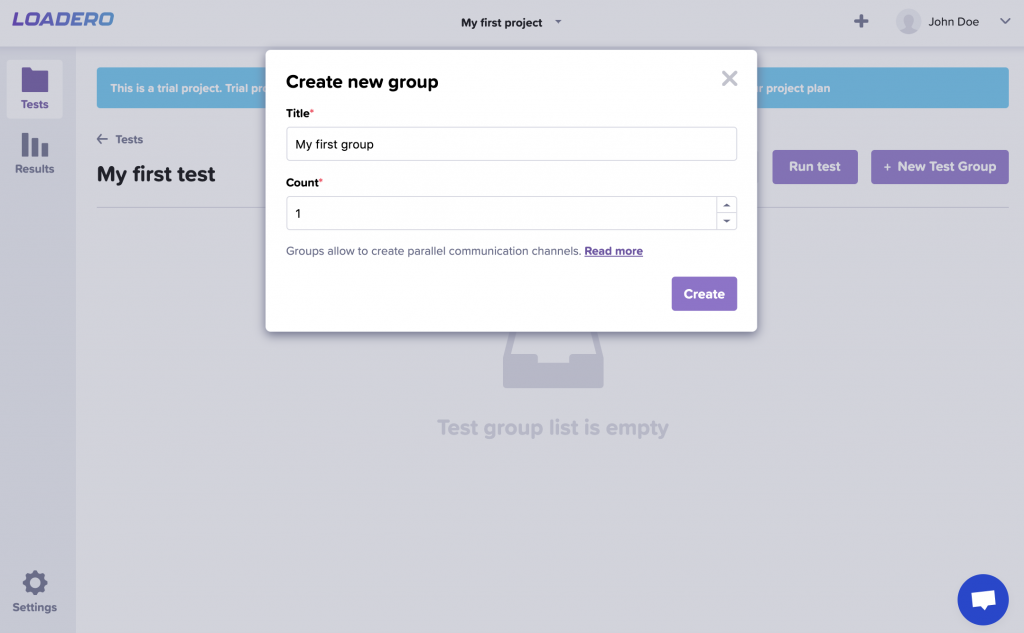
5. Now we have created a test, but it is not ready for execution yet, as it requires participants who will execute this test. So after we created a test, we are redirected to the test group view which holds groups. The group is a structure that allows us to create different participant flows in a single test scenario. So let’s create a group by clicking – “New Test Group” button.
6. A “Create new group” dialog will appear in which we will be able to specify the group name and the count of identical copies of this group. For this example, we will create just one group so specify its name and set count to 1. After doing that, click – “Create” button.
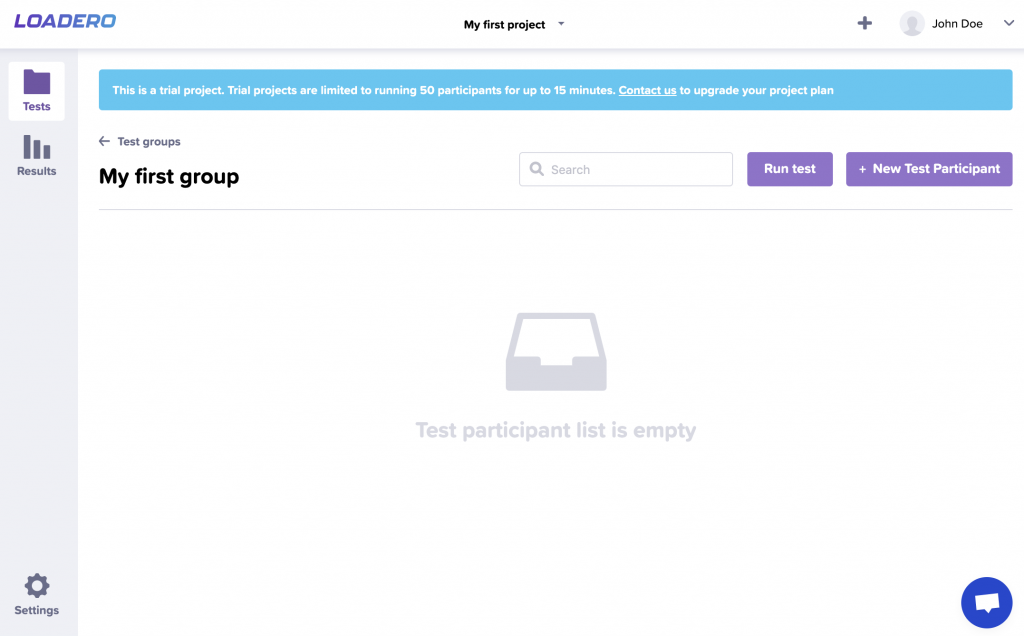
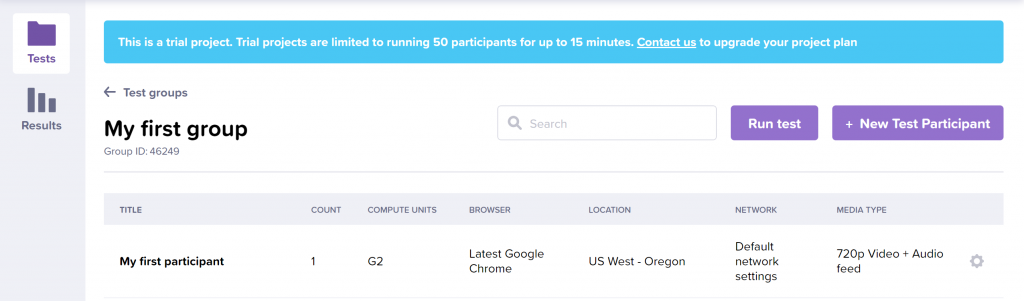
7. Now we have been redirected to the test participant list view of the created group which will hold all participants and their configurations for this specific group. Click “New Test Participant” button to create a test participant, which will act as a browser instance running the test.
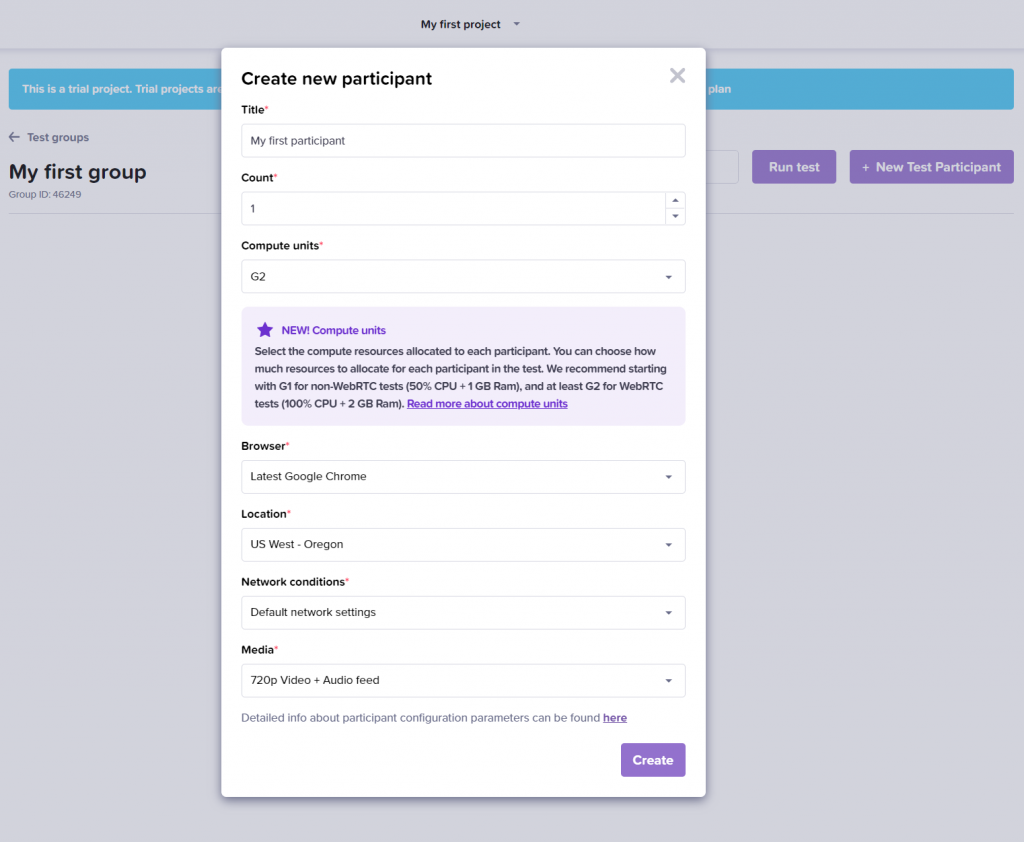
8. “Create new participant” dialog holds all participant configuration options – Title, Count, Compute units, Browser, Location, Network conditions, and Media. For more information regarding the group-participant structure and participant configuration parameters, click here.
For this example, we will create one participant with a G2 compute unit(100% CPU core + 2 GB RAM), read more about compute units and how to choose for your needs. Our test participant will be using latest version of the Google Chrome browser. This participant will be located in the US West – Oregon region with default network conditions and 720p fake Audio/Video media feed. To finish participant creation click – “Create” button.
9. Now we can see our created participant with all our defined configurations. Let’s navigate back to the project test view by clicking – “Tests” icon in the sidebar on the left side.
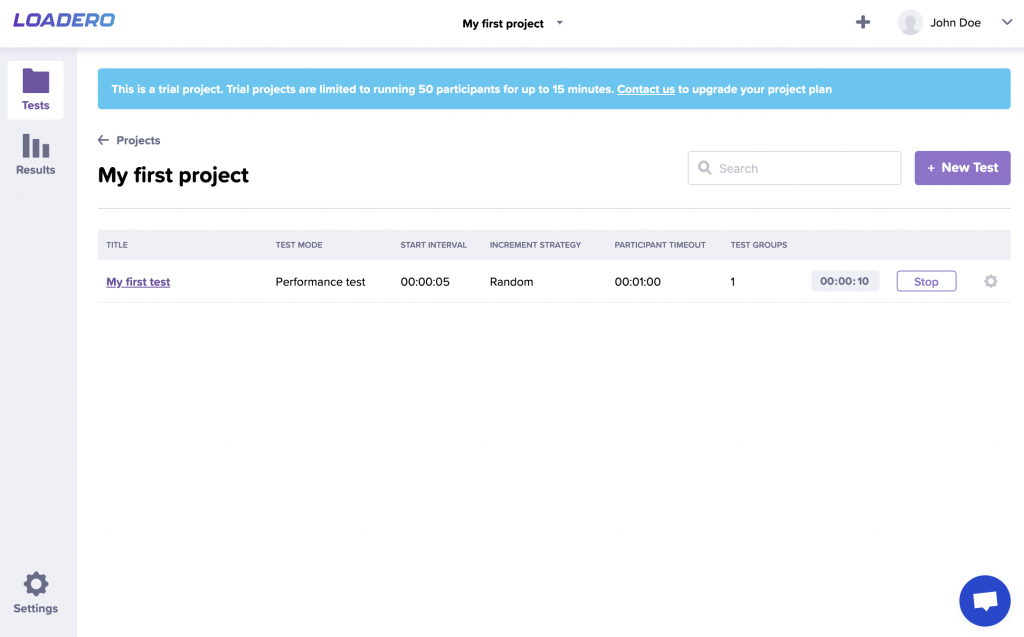
10. After navigating back to the project test view, our preparations for test execution are complete. So let’s run our created test by clicking – “Run test” button. By doing this, we have started a test run with all our specified configuration for the test.
11. When you run the test, “Run test” button changes to “Stop” indicating the test is running. Also, we can see how long the test has been running indicated by a timer on the left side of the “Stop” button.
Now we will go to the results screen by clicking – “Results” icon on the left side sidebar.
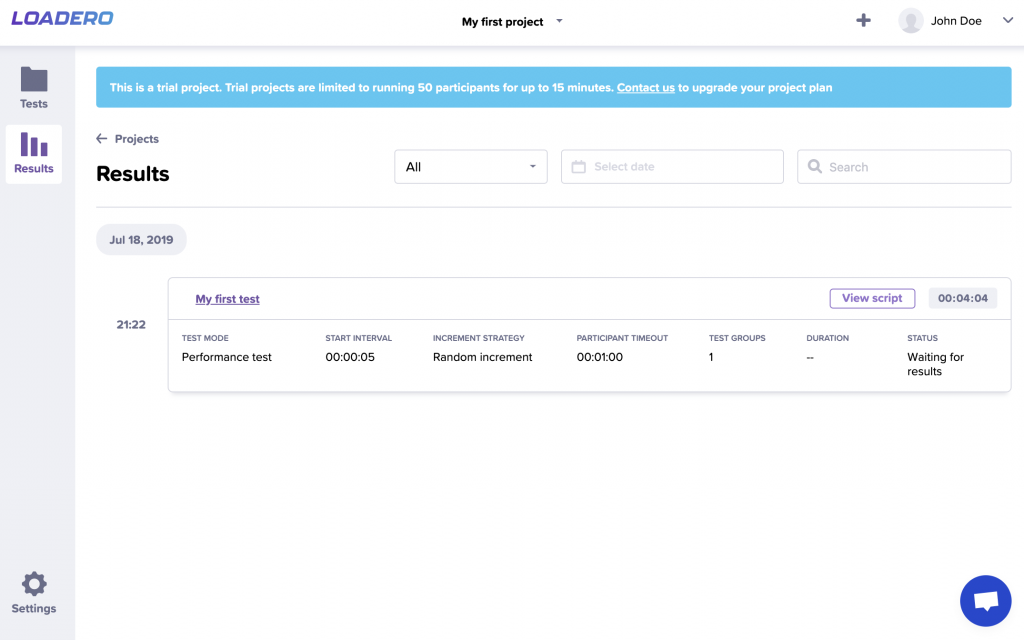
12. As we enter the Results view, under the “Status” column, we can see our test is now being initialized indicated by the status message – “Initializing Environment”. The initialization stage might take quite some time to complete as we are preparing a test environment. Also, if you see “Pending” status instead, don’t worry, it means that your test is just waiting in a test run queue and will run soon. Now we wait for the test to finish.

When all preparations on the Loadero side will be complete, and the actual test will start its execution, the status message will change to – “Running”.
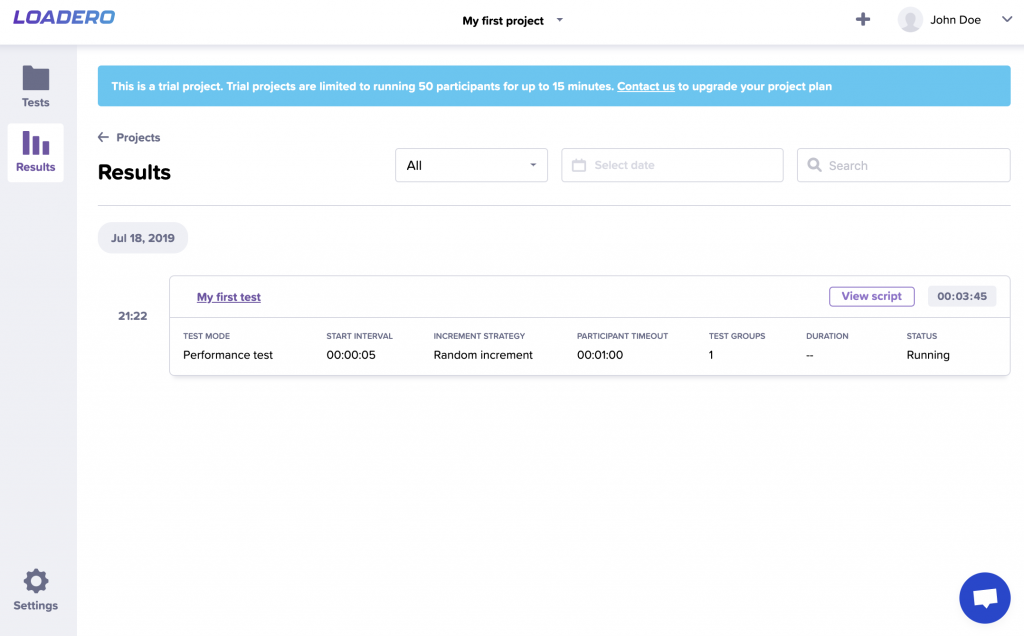
Status message change to – “Waiting for results” will indicate that test execution is finished for all participants and Loadero is collecting and saving all available information regarding this test run.
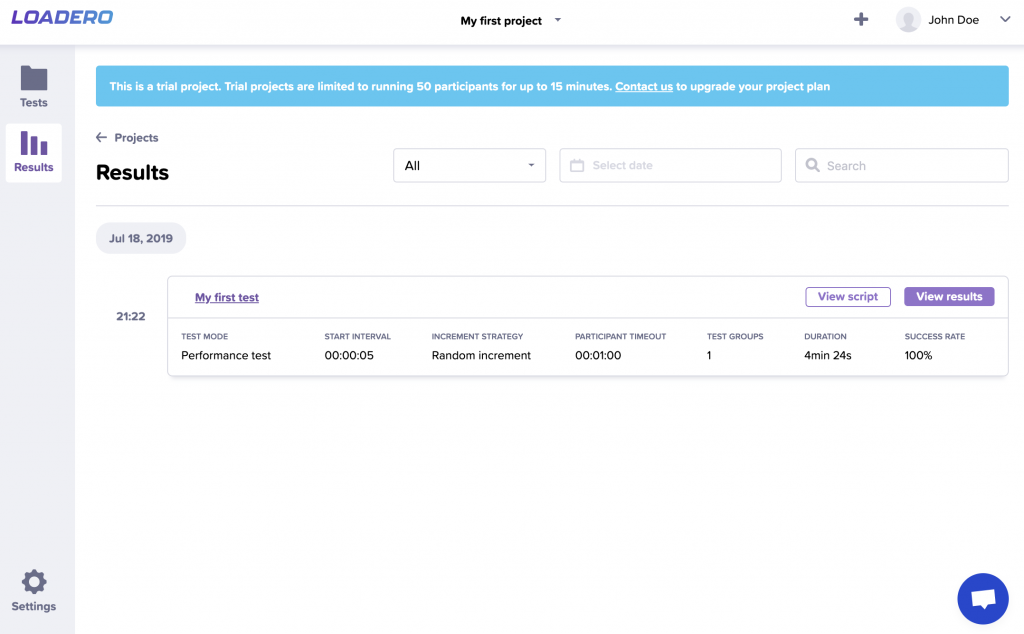
When all information has been collected, the status will disappear, and the test run will be complete. In this view, we can see a small overview of the test run with its success rate and full duration.
For more information regarding this test run, we can view results by clicking – “View results” button for that test run. For learning what info you can get from Loadero results report, you can read our blog post about reports.
And that is it; this is how you can start using Loadero for your testing needs. Give it a try and you will see that Loadero is a powerful, easily adjustable and extremely helpful tool to test your web applications with thousands of different configurations. If something has been left unclear, and you have any questions regarding Loadero, feel free to send an email to support@loadero.com. We are here to help you successfully use our tool.


