

It is easy to test a web application using Loadero by writing a simple test script. But sometimes a more complex test is required, for example, when one participant acts as an administrator that sets up the video call room, and other participants are just joining it as attendees. In such cases the test needs to handle different test flows to achieve expected results, and different participants have to perform different actions in the same test. Being able to define what each test participant does, is crucial to handle different edge cases within testing target scenarios. With Loadero you can achieve this by using available variables that utilise group-participant structure. Today we will see how it can be used in a simple test with two participant groups, but sure you can create more separate groups in your tests, if you need.
In the real world we hardly ever see users doing the same action in parallel but rather each doing something on their own, with different speed delay and purpose. For example, if you test a web application for video calls, few participants could be using 3G mobile network, others could have lower resolution and therefore video quality would be only 480p, and others could join later and not use a camera at all. This is one of many possible situations that could happen in the real world. Each of these scenarios is a flow. We can simulate each flow by writing a test script.
Prerequisites:
- Active Loadero account (you can create one here, it’s free).
- Logged in Loadero.com with your active account.
- Project in which we will be creating a new test scenario.
So let’s get started and take a look at the simple example, we will be working on. On that note, we will set the project language to ‘Javascript + Nightwatch’. All of this can be similarly accomplished in ‘Java + TestUI’ language as well.
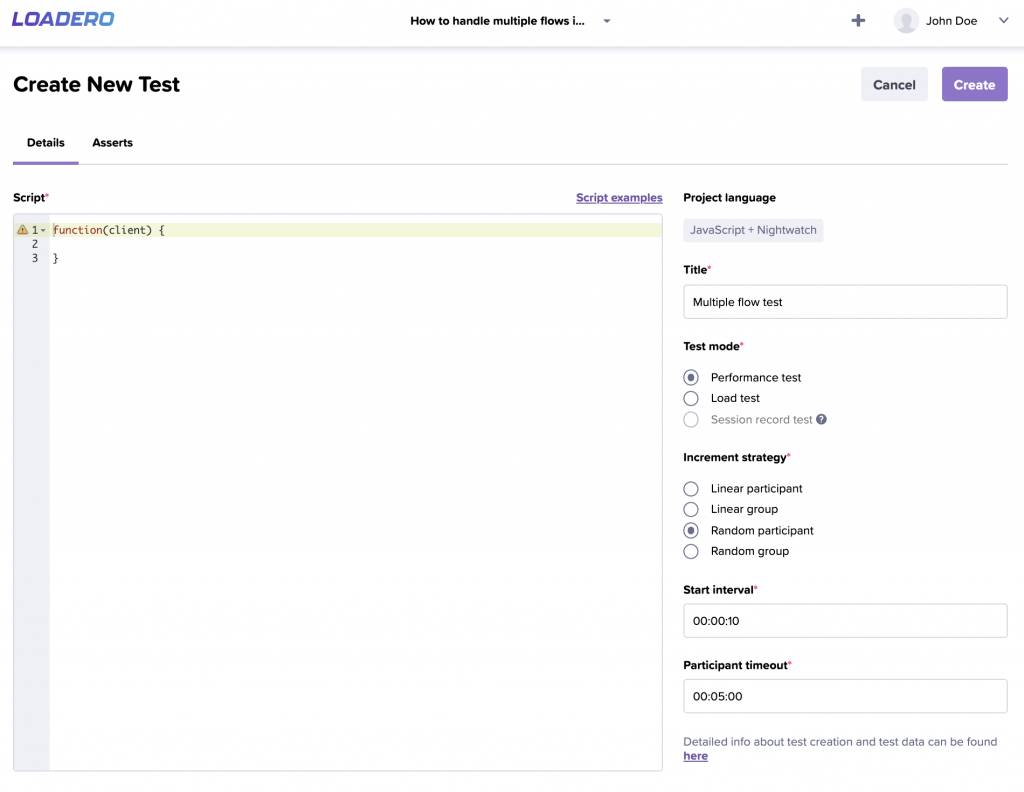
1. First of all, we need to create a test (If you haven’t created one yet, make sure to take a look at our blog post about creating a simple performance test). For this we will use the following configuration:
- Title – ‘Multiple flow test’
- Test mode – ‘Performance test’
- Increment strategy: ‘Random participant’
- Start interval – 10s
- Participant timeout – 5min
- Script – for now let’s leave it with default empty function, as we will return to this after we have finished setting up test groups and participants.
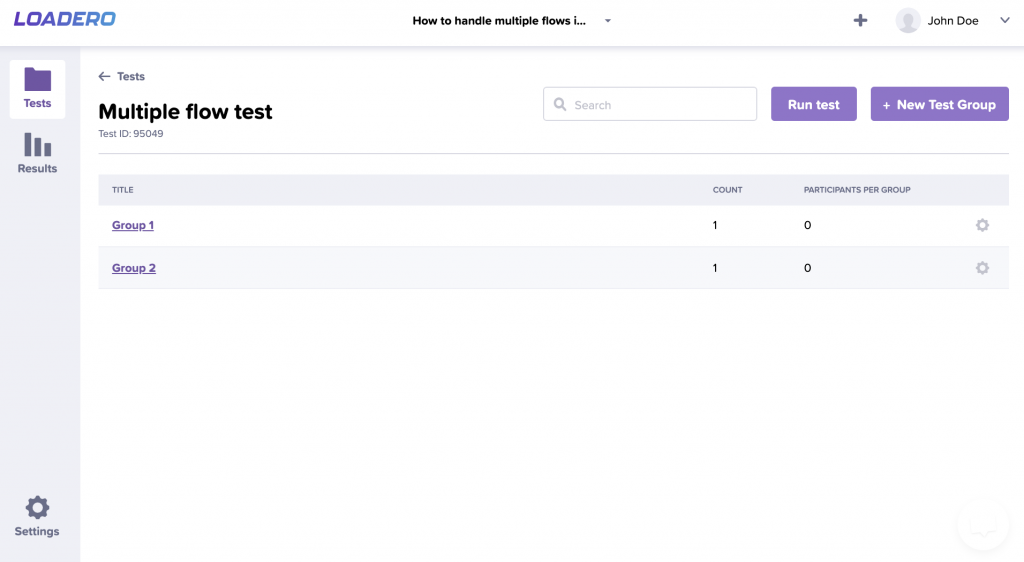
2. After that, for the created test we will create 2 groups. Let’s name them ‘Group 1’ and ‘Group 2’ with count set to 1 for each of them.
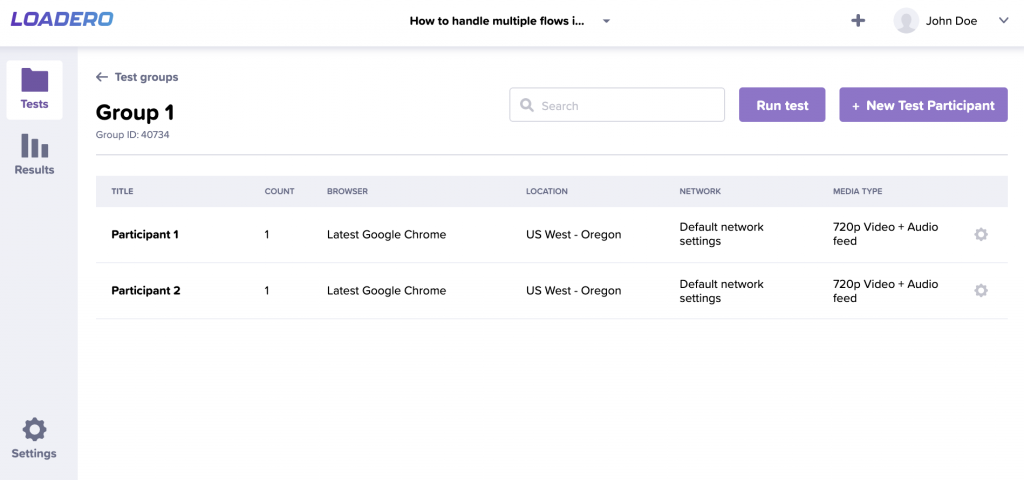
3. For both groups we will create 2 participants with these configurations:
- Title – ‘Participant 1’ / ‘Participant 2’
- Count – 1
- Browser – ‘Latest Google Chrome’
- Location – ‘US West – Oregon’
- Network – ‘Default network settings’
- Media type – ‘720p Video + Audio feed’
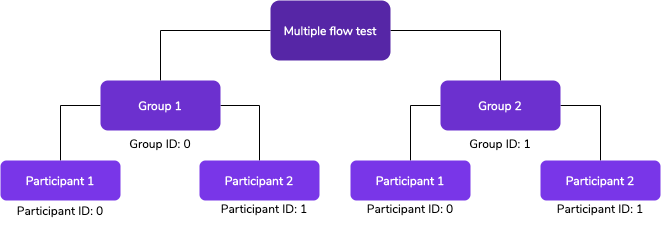
This is the test structure we have now created:
4. Now let’s navigate back to the project test view and edit the test script. We will implement a simple script which will open Google’s website, input different search queries in the search box and, after getting results for that query, take a screenshot. We will also adjust network conditions for some of the test participants using the updateNetwork() custom command.
As we use ‘Javascript + Nightwatch’ language in this example, we will access variables through client.globals directive. To learn more about custom Loadero variables, check out our wiki for JS and Java:
- Participant ID (
participant.id) – unique identifier within specific participant’s group, starts from 0 and increases incrementally. If you want to retrieve a unique ID within the whole run use Run Participant ID (run.participant.id) global variable. - Participant name (
participant.name) – user-specified participant name. - Group ID (
group.id) – unique identifier within the test, starts from 0 and increases incrementally. - Group name (
group.name) – user-specified group name.
function(client) {
    client
        // Open page
        .url('https://www.google.com')
        // Waits for 'body' element to be visible
        .waitForElementVisible('body', 10*1000);

    // This flow executes for 'Group 1' by matching group's name
    if (client.globals.group.name === 'Group 1') {
        // This will be executed for "Participant 1" within "Group 1"
        if (client.globals.participant.id === 0) {
            // Inputs 'QA Processes' in the search box
            client.setValue('input[type=text]', 'QA Processes');
        }

        // This will be executed for 'Participant 2' within 'Group 1'
        if (client.globals.participant.id === 1) {
            client
              // Inputs 'Software testing' in the search box
              .setValue('input[type=text]', 'Software testing')
              // Updates network condition to '3g' for this particular participant
              .updateNetwork('3g');
        }
    }

    // This flow executes for 'Group 2' by matching group name
    if (client.globals.group.name === 'Group 2') {
        // Inputs 'Riga' in the search box for both 'Group 2' participants
        client
          .setValue('input[type=text]', 'Riga')
          // Updates network condition to '4g' for both 'Group 2' participants
          .updateNetwork('4g');
    }

    client
        // Triggers search by sending 'Enter' key event to the search box
        .sendKeys('input[type=text]', client.Keys.ENTER)
        // Waits for 'body' element to be visible after searching for results
        .waitForElementVisible('body', 10*1000)
        // Takes screenshot of search results
        .takeScreenshot('result.png');
}
5. Now we can run the test and observe the results in the test report. If there is some uncertainty or you want to learn how to get most out of test reports, check out this blog article. We can check Selenium logs to see what commands were executed explicitly for that participant or open the artifact tab and download the screenshot taken during the test to validate that the search query was different among participants.
The example we looked at was a very simple implementation in order to easier understand how to accomplish multiple flows within tests. You can use multiple flows for different page navigation, downloading different media, various user inputs and much more. Sign up to our free trial subscription and use all these features, when you test a web application. If you have any issues with using multiple flows, or just have any questions, feel free to contact our support team at support@loadero.com


