

When developing web applications, one of the important things is to provide smooth accessibility of your product to the clients. But that is not an easy task to accomplish as several factors come into play. One of them is the available network speed and stability of it. Testing your web application performance with various network types and packet loss cases is a must to make sure everything works great for the wide audience. Therefore, in this blog post, we will take a look at one of Loadero service built-in features to test your web application performance with different network conditions.
Here are some examples of what can be accomplished by such testing:
- Test if the sudden internet connection loss is being handled accordingly.
- Check load times of your application with reduced network speed.
- Validate WebRTC application stability with network packet loss.
There are two ways to alter participant network conditions, and we will take a look at both of them:
- Specifying a network condition for each participant in the participant setup phase.
- Calling Loadero custom command to update network during script execution.
Prerequisites:
- Active Loadero account (you can create one, it’s free).
- Logged in Loadero.com with your active account.
- Basic knowledge of the Loadero service structure and simple test structure created (read more about how to create a simple test in Loadero).
Network conditions defined in participant configuration
Let’s start with the method where we will take a look at available network conditions during participant setup.
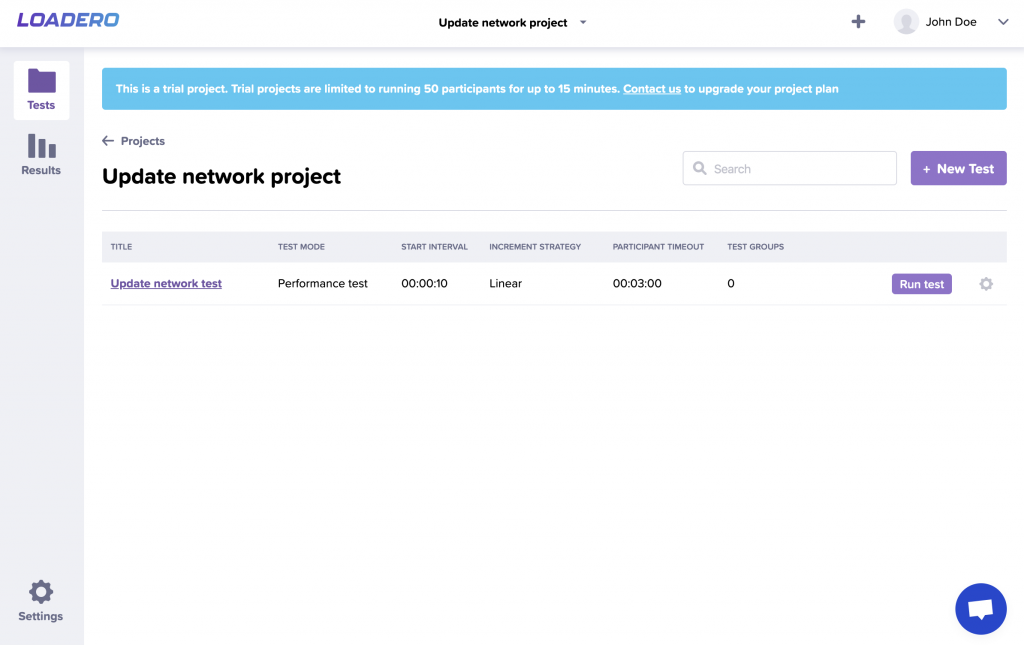
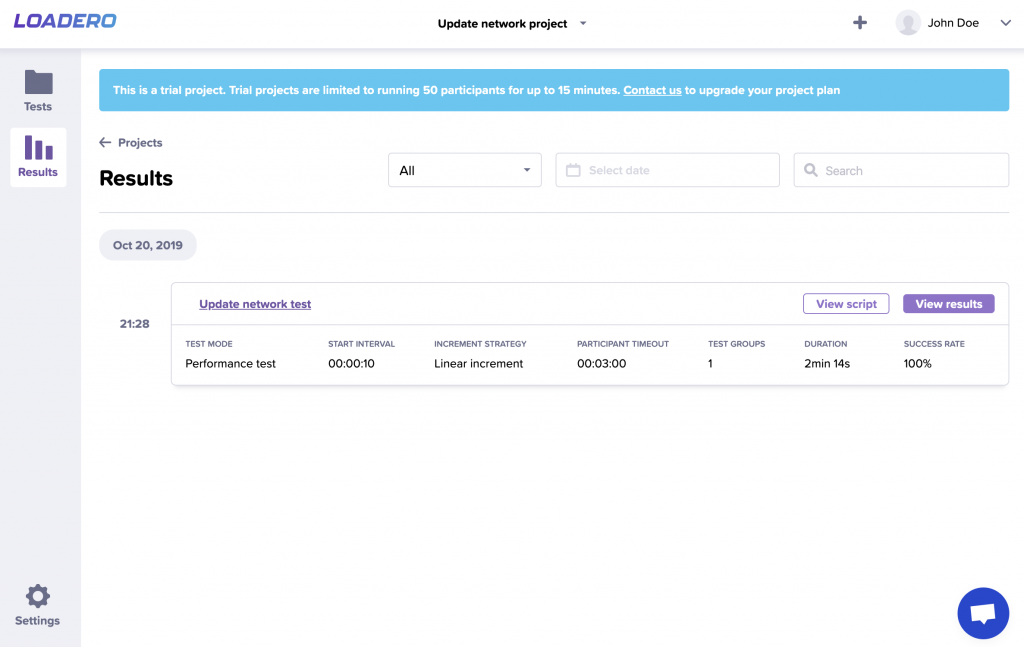
1. We assume you have created a project in “JavaScript + Nightwatch” language. If you need more info on using Nightwatch in Loadero, make sure to take a look at this blog post with our beginners guide to test automation with Javascript + Nightwatch. If you need some help, feel free to contact our support team by writing to support@loadero.com. Now let’s create a new test and name it “Update network test.” Set this test to “performance test” mode, set “Increment strategy” to “Linear,” with start interval set to 10 seconds, and participant timeout to 3 minutes. Currently, we will leave script to default suggested one and get back to it later on.
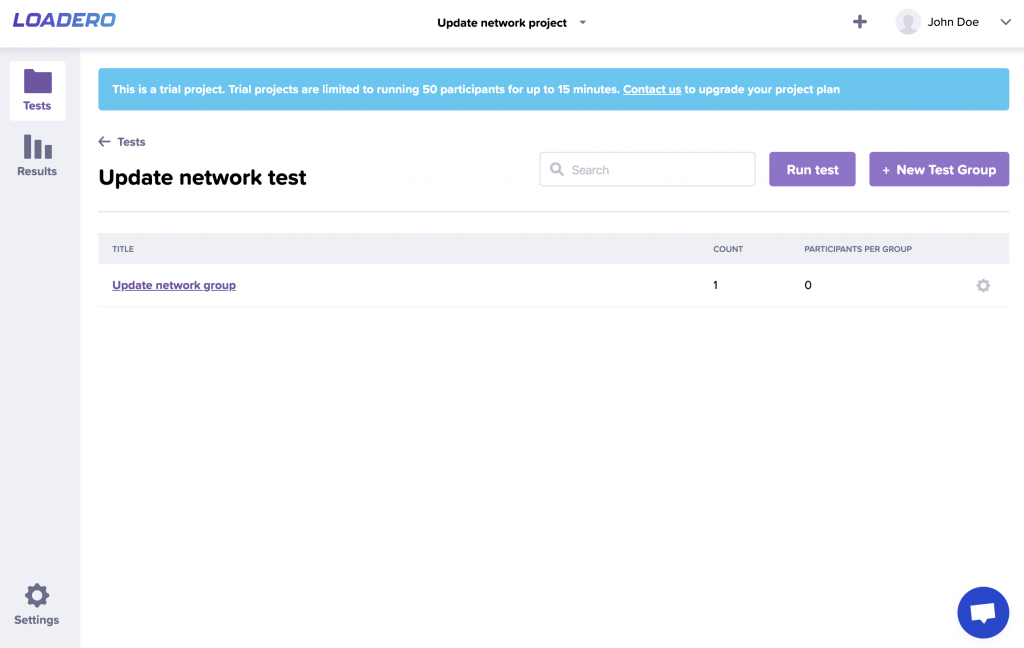
2. After creating a test, we need to create a group where participants will be held. Let’s call it “Update network group” and set count to 1.
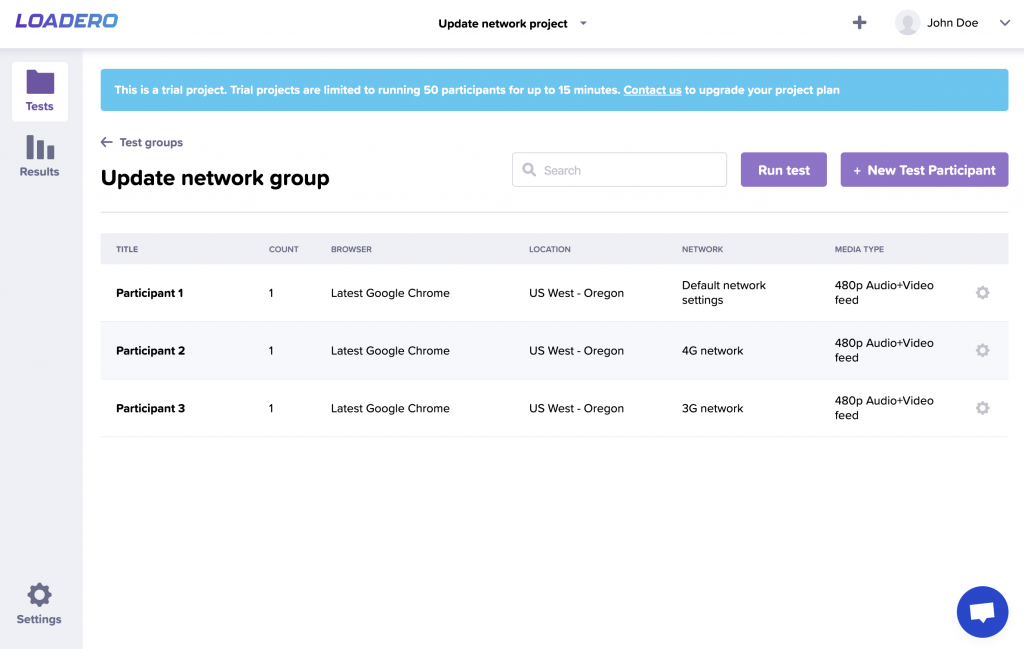
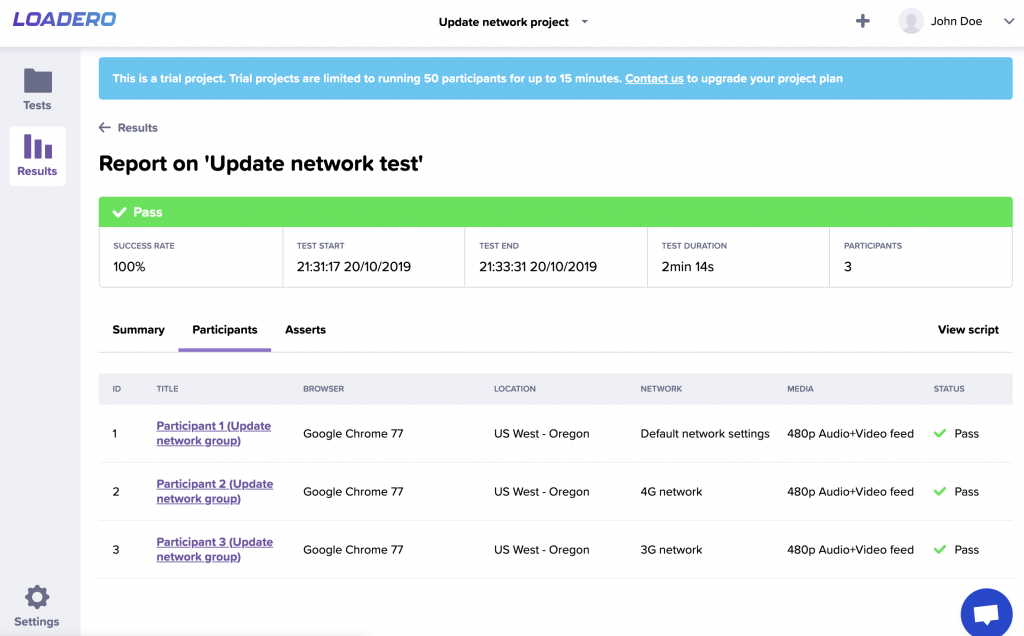
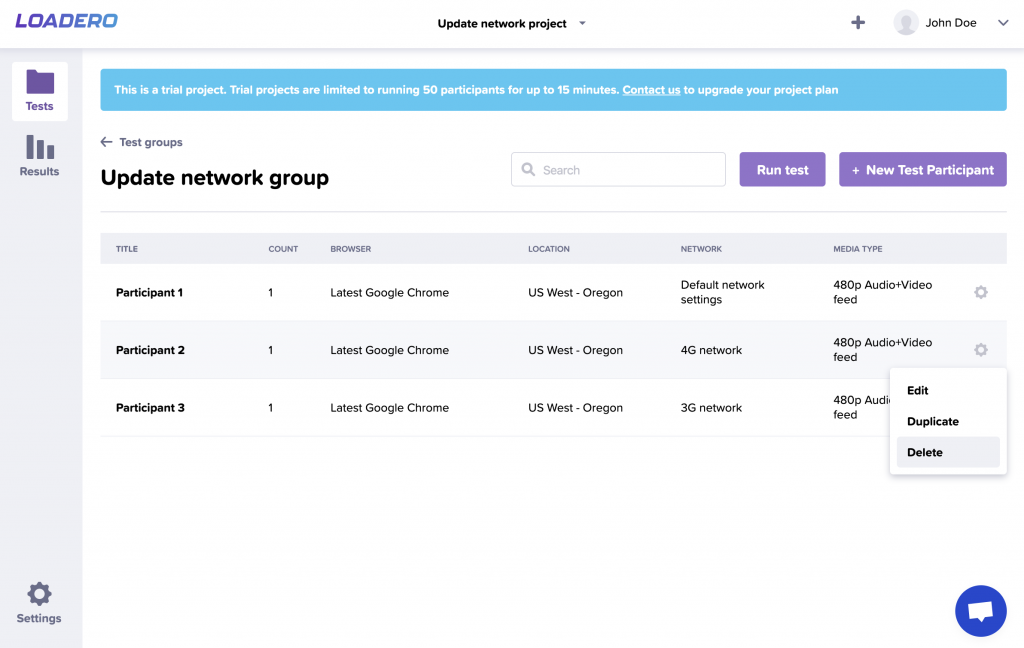
3. Now that we have created a test and also a group inside the test, we can create participants who will be used for this test. To show different possible participant network conditions for this example, we will create 3 participants with different names and network conditions:
- Name – “Participant 1”, count – 1, browser – “Latest Google Chrome”, location – “US West – Oregon”, network conditions – “Default network settings” and media – “480p Audio+Video feed”.
- Nаme – “Participant 2”, count – 1, browser – “Latest Google Chrome”, location – “US West – Oregon”, network conditions – “3G network” and media – “480p Audio+Video feed”.
- Name – “Participant 3”, count – 1, browser – “Latest Google Chrome”, location – “US West – Oregon”, network conditions – “4G network” and media – “480p Audio+Video feed”.
4. Now that we have created participants for the test, let’s revisit the test script, which we will be using for this example. Go to the test screen, press the gear icon on the right side of your created test row, a dropdown menu will appear with several options. Choose “Edit” from these options. This will take you to the test edit screen, and there you can edit previously saved script and press “Save” after making your changes.
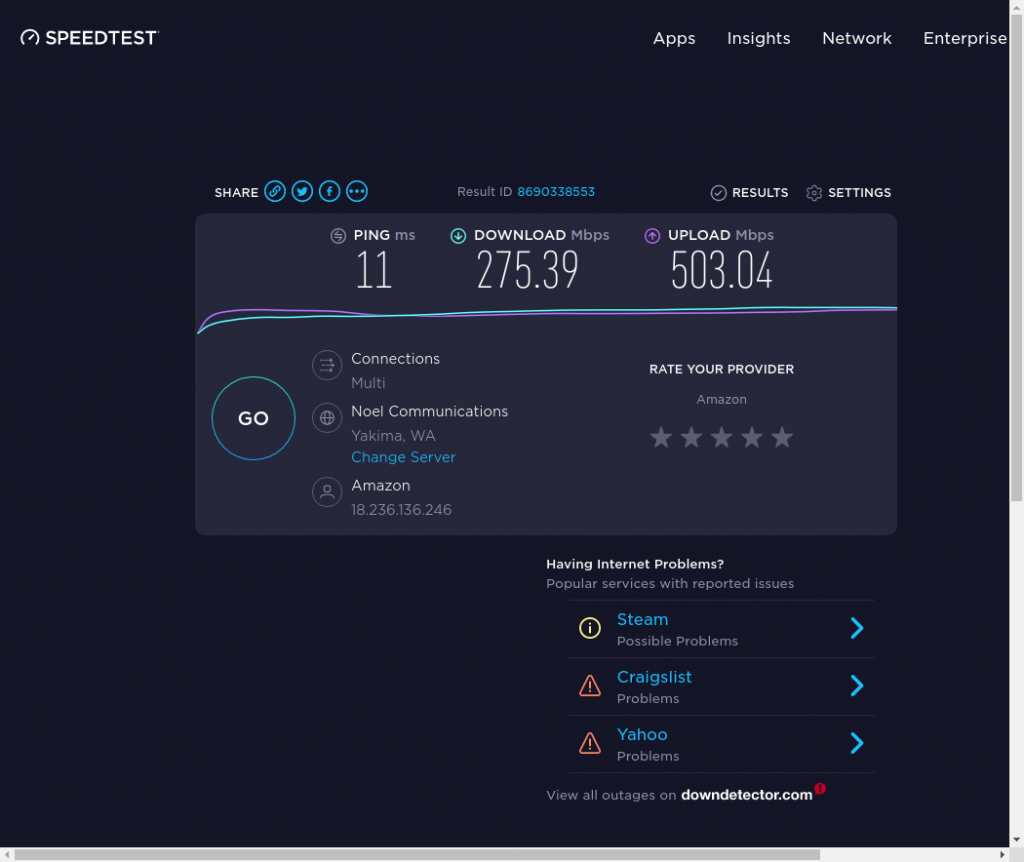
The script we will be using will open network speed test Speedtest.net, run the speed test, and, as soon as it has finished, take a screenshot of the page. We will be able to see this screenshot later in the test results. Doing this will provide visual feedback on the Loadero network conditioner in action.
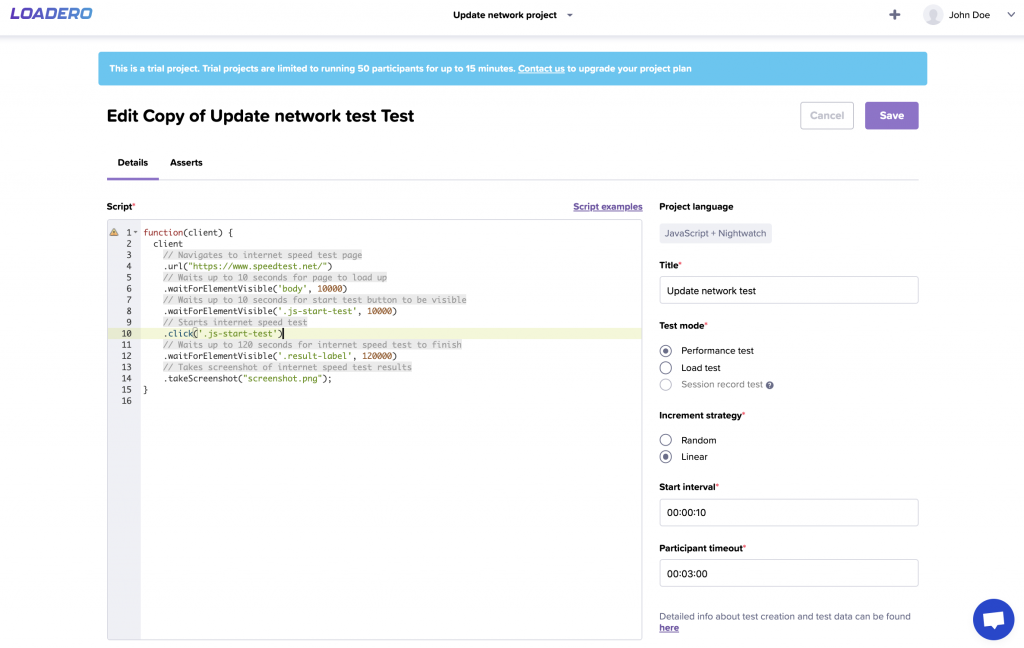
Script used in the example:
function(client) {
  client
    // Navigates to internet speed test page
    .url("https://www.speedtest.net/")
    // Waits up to 10 seconds for page to load up
    .waitForElementVisible('body', 10000)
    // Waits up to 10 seconds for start test button to be visible
    .waitForElementVisible('.js-start-test', 10000)
    // Starts internet speed test
    .click('.js-start-test')
    // Waits up to 120 seconds for internet speed test to finish
    .waitForElementVisible('.result-label', 120000)
    // Takes screenshot of internet speed test results
    .takeScreenshot("screenshot.png");
}
5. Since all our preparations are complete, press the “Run test” button and wait for the test to finish its execution. When it has finished, open the results screen and press “View results” for the corresponding test run to see the report.
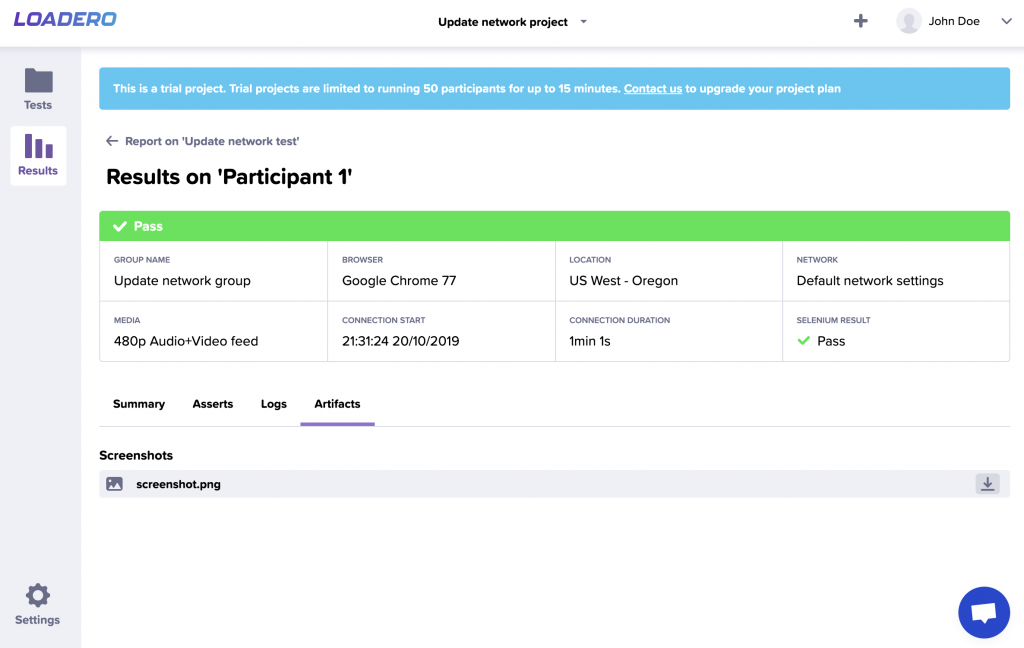
6. In the report screen, we can see all kinds of different statistics for the test run, but let’s not focus on them in this case. Switch to the “Participants” tab and select any one of our participants, to see more detailed info about that specific participant. More information about Loadero reports and how to use them can be found in this blog post.
7. This time we are interested in the network information that is gathered in the screenshot that you can download from the “Artifacts” tab. So we will switch to that tab and download the screenshot available there.
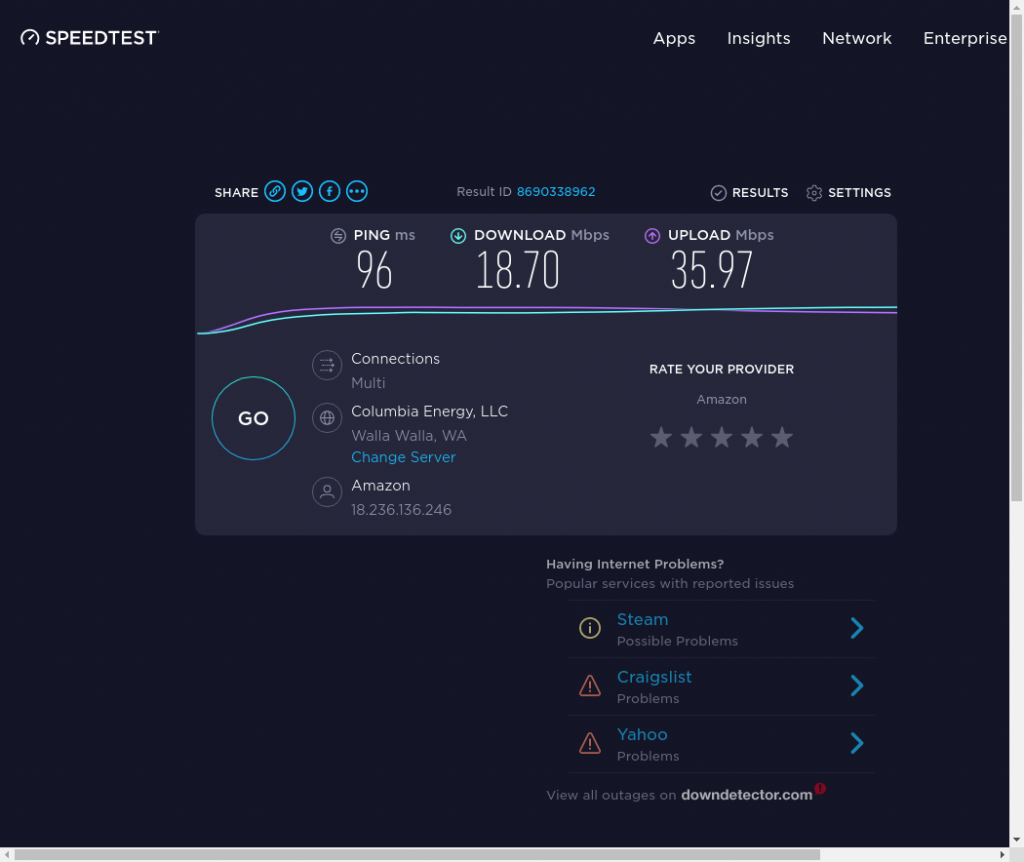
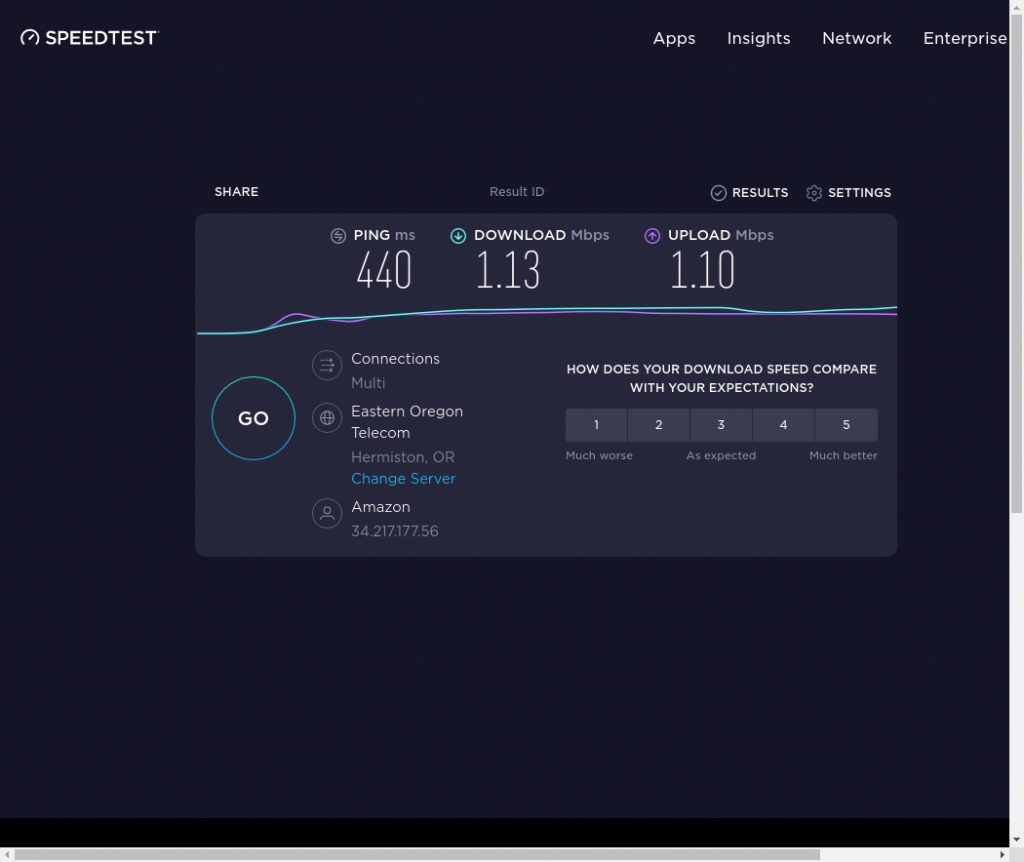
8. Now opening that image, we can compare it to other participant screenshots and see how network conditions have altered the results. As you can see in the pictures below, all screenshots have produced different results. Network conditioner has successfully adjusted participant’s network conditions.
Network conditions updated within the test script
The second option available regarding network conditions is changing the conditions during test execution using Loadero custom command. More info is available in Loadero wiki for both JavaScript and Java languages.
All we have to do is alter our test script and call the custom network update command. You can call this command multiple times within one test execution. The changes will be only applied in the scope of that test run. They will not alter the base configurations set for participants. The network condition options available to pass to update network command can be found in the wiki as well. So let’s do just that.
1. To accomplish this we will first delete 2 of the previously created participants. To do that, navigate to the test participant list.
2. Then click the gear icon to the corresponding participant we want to delete. A dropdown menu will appear with several options; this time, click the “Delete” option. Let’s leave the participant with default network conditions defined.
3. After that, we need to alter the previously used script. To do that, navigate to that specific test edit screen.
4. Now we can modify the script by calling Loadero custom update network command with “4g” as its parameter before running the internet speed test. This, as soon as it is called within test execution, will alter currently used network conditions for that participant.

Script with altered example code using update network command:
function(client) {
client
// Navigates to internet speed test page
.url("https://www.speedtest.net/")
// Waits up to 10 seconds for page to load up
.waitForElementVisible('body', 10000)
// Update current network conditions to 4G network condition option
.updateNetwork('4g')
// Waits up to 10 seconds for start test button to be visible
.waitForElementVisible('.js-start-test', 10000)
// Starts internet speed test
.click('.js-start-test')
// Waits up to 120 seconds for internet speed test to finish
.waitForElementVisible('.result-label', 120000)
// Takes screenshot of internet speed test results
.takeScreenshot("screenshot.png");
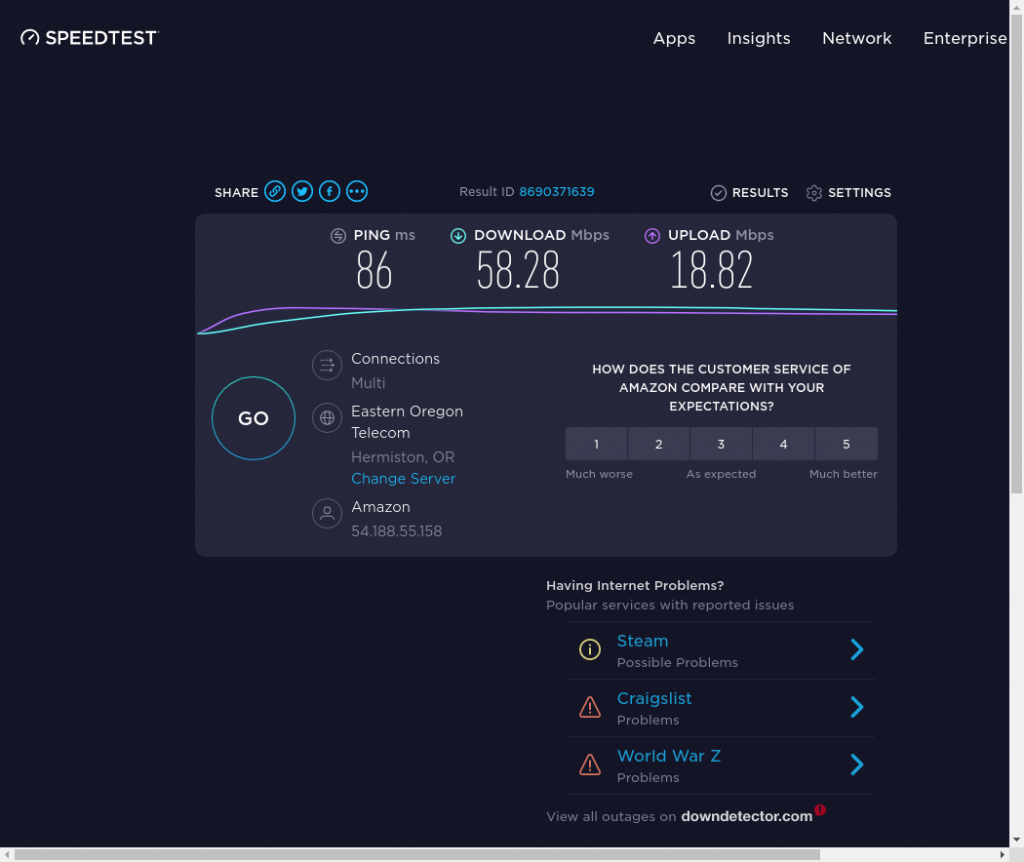
}5. Save the edited script and rerun the test. When the test has finished execution, we can look at the created screenshot in results the same way as before. We see that network conditions were changed successfully during test execution.
And that is how Loadero service allows you to test your web application performance with different network conditions applied. You may have a heavy application, and its load times will have a great impact on users’ experience, or a WebRTC app, that should behave correctly when packet loss takes place. For any kind of application, you have to plan correct handling of sudden customer Internet connection loss.n. If you want your users to have great user experience, then testing your web application performance with different network conditions is a must. You can do all this and much more for free with Loadero trial subscription.


