

Loadero supports three feature-rich test frameworks: Javascript + Nightwatch Java + TestUI, Python + Py-TestUI, but to expand the functionality further, we also develop custom commands for more insightful performance and load testing. One of the recent additions to the custom commands to use in your Loadero test scripts is the timeExecution() command.
It is a common request among our users and customers to measure how long it takes to perform some actions in an application under a high load. The timeExecution() command measures and reports the execution time of a certain function or set of functions. This command allows to time the execution of a flow, such as logging in, checking out in an e-commerce site, joining a WebRTC call, or any other flow you have as a part of your test script. The results of this command can be used for post-run analysis to understand if the time required to complete a flow increases under load and help optimize the performance of your website.
To use the timeExecution() command, you simply provide a name for the function you want to time, the function itself, and an optional timeout value.
client.timeExecution(name: string, timedCommand: Function, timeout?: number);
The name argument is used to identify the function and will be included in the log message that is generated. If no name is provided, the function’s name attribute will be used if available, otherwise the name will default to “anonymous”.
The timedCommand argument is the function whose execution will be timed. This function can either have no parameters, in which case its execution will be timed and completed immediately at the end of the function’s execution, or it can have one parameter to allow for asynchronous execution.
Here is an example of a script that uses timeExecution command in which the timedCommand is with and without parameters.
client => {
   // Define a variable which will contain participant credentials.
   let participantCredentials = {};
   const loadCredentials = done => {
       // Calling request to retrieve data from a mock url that has the same previously hardcoded credentials
       axios
           .get('https://run.mocky.io/v3/46c01fcf-35c0-4ff7-b12e-d155b5edb615')
           .then(({ data }) => {
               participantCredentials = data;
               // Calling done callback function signaling that this function has finished retrieving data and test script can continue.
               done();
           })
           .catch(error => {
               throw new Error(error);
           });
   };
   // Now we can access credentials for this participant using `participantCredentials.username` and `participantCredentials.password`
   const logIn = () => {
       client
           .url('https://practicetestautomation.com/practice-test-login/')
           .waitForElementVisible('#overflow-container')
           .sendKeys('#username', participantCredentials.username)
           .sendKeys('#password', participantCredentials.password)
           .click('#submit')
           .waitForElementVisible('.post-content a');
   };

   client
       .timeExecution("load_credentials", loadCredentials)
       .timeExecution("login", logIn);
}
The timeout argument specifies how long, in milliseconds, to wait for the timedCommand function to execute. If the execution time exceeds the specified timeout, an error will be thrown. You can also read the documentation for the timeExecution() command for each of the available frameworks in Loadero here:
Measuring how long it takes to log into an application
The timeExecution() command is a great way to measure the performance of your application under load. This can be used to analyze execution time for specific scenarios. For example, timing a login flow with few users and then running a load test with hundreds or thousands of users to see how much time it takes to complete the whole login flow when there are more participants in the test. Let’s take a look at the following script example and results for automated login flow with timeExecution() custom command for 2 participants. For the second test we will configure participants to use a slower network than in the first test and compare how long it takes to complete the login flow. Our test script will make test participants visit the Practice Test Automation website’s test login page, wait for it to load, input login and password, click “Submit” and wait for the next page to load. We’ll use the timeExecution command to measure how long the execution takes for the whole flow and another timeExecution command to measure the time it takes to redirect to the next page after submitting the login form. Here is the test script we’ll use:
client => {
    client.timeExecution("login", () => {
        client
            .url('https://practicetestautomation.com/practice-test-login/')
            .waitForElementVisible('#overflow-container')
            .sendKeys("#username", "student")
            .sendKeys("#password", "Password123")
            .timeExecution("submit_login", () => {
                client
                    .click('#submit')
                    .waitForElementVisible('.post-content a')
            })
    })
}
In the first test participants have a default network configuration set to see how long it takes for them to complete the login flow without any network limitations. You can learn more about participant configuration on our wiki page.
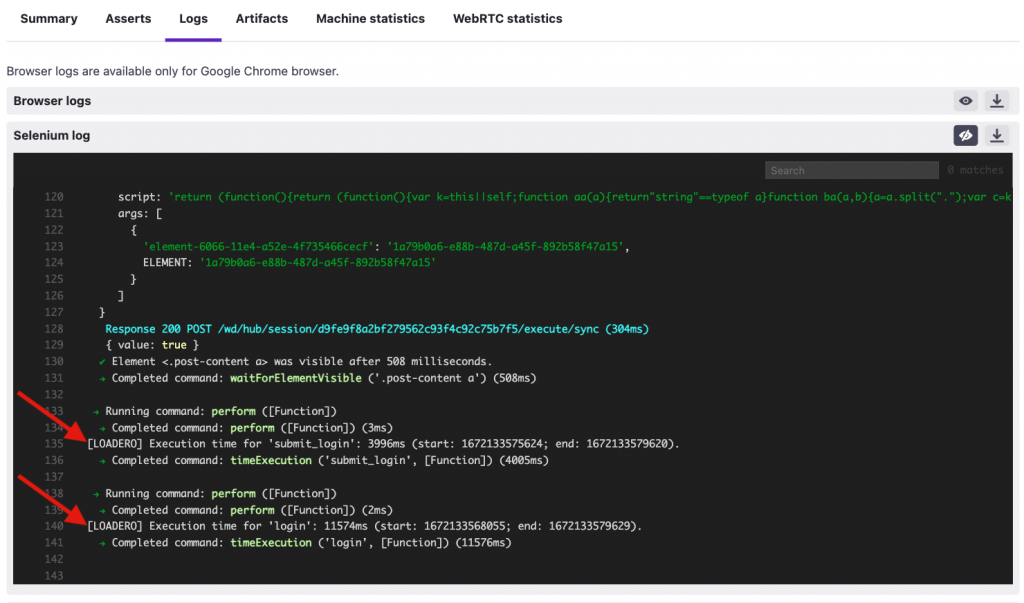
After the test has finished, under the participant’s Results view -> Logs -> Selenium log we can see that for 1st participant it took 11.5 seconds to complete the login flow and almost 4 seconds to submit the form and load the next page:
Similarly, for the 2nd participant it took around 13.2 seconds to complete the login flow and 5.8 seconds to submit the form and load the next page:

Even though both participants have the same participant configuration in the test, the time in which each participant executes the flow will slightly differ as participants run separate sessions. This is also why we used 2 participants in tests – to have more results for average execution time and to minimize edge cases if some action takes exceptionally longer than it should for a single participant.
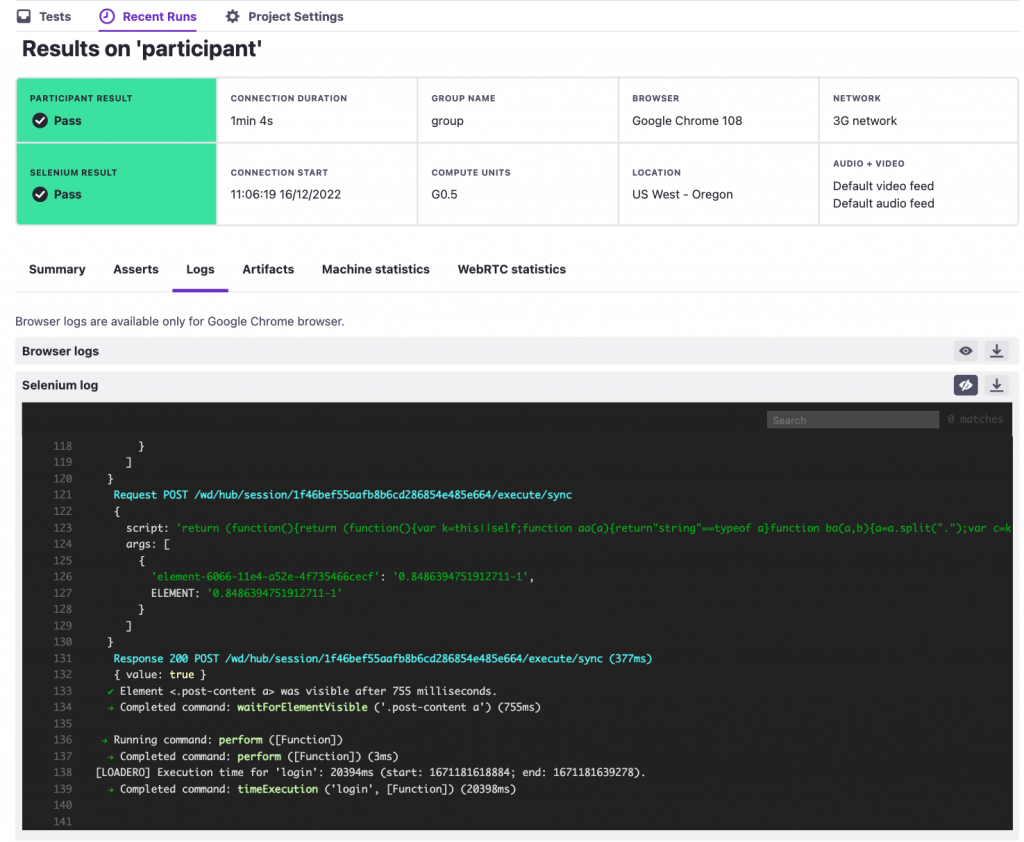
Now let’s run another test in which both participants are using a slower 3G internet connection, no other changes were done to our test setup. In the participants’ Selenium log we can see that now it takes around 20.4 and 19.6 seconds for both participants, respectively, to finish the whole login flow.
Participant 1:
Participant 2:

This is one of the ways to easily find potential performance issues for a website under test when many users are browsing the page or using different network conditions.
Furthermore, if we know a specific timing for how long users should take to finish a certain flow and anything besides could be considered a failure, then we can also define a timeout for this function to immediately fail if it takes longer than the specified time.
In our example let’s specify a 15 seconds timeout to our login timeExecution() function by adding a 3rd argument – time in milliseconds, which will look like this:
client.timeExecution("login", logIn, 15 * 1000);
Important: The timeout parameter is set in milliseconds for test scripts written in Javascript or Java, in the test scripts in Python the timeout must be specified in seconds.
Also, let’s change participant configuration to have 1 participant with default network condition and 1 with 3G network, so based on previous results, 1st participant should pass the test, but 2nd participant should fail the test as it will take more than 15 seconds to complete the login flow.
And here is the test result just as we expected:
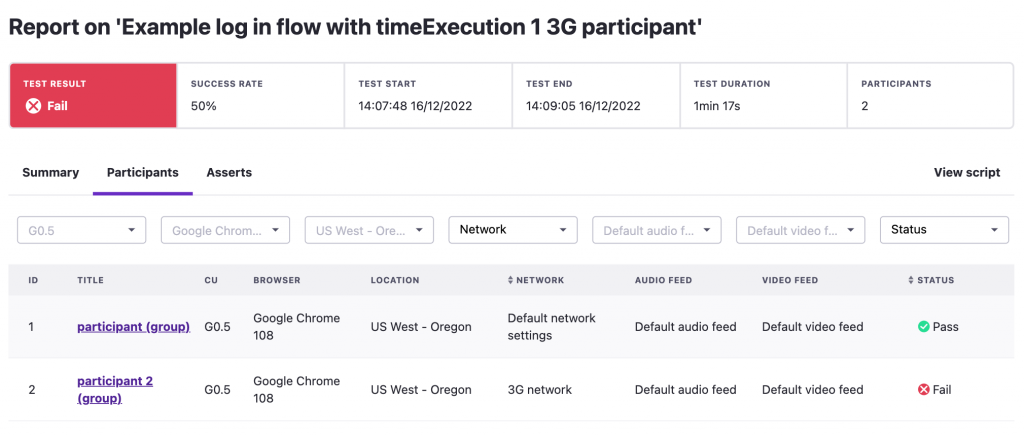
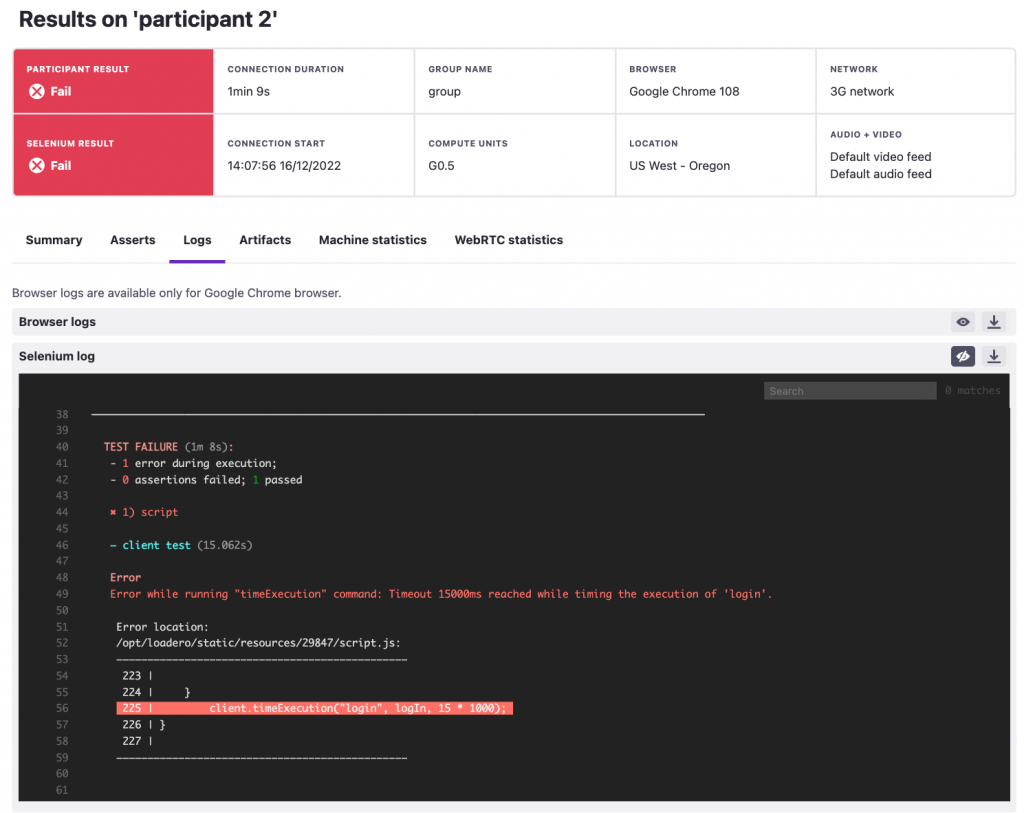
The participant with default network settings passed the test, but the other participant with 3G network failed the test and in the Selenium log we can see that the reason for failure was that the login function took longer than 15 seconds to complete.
We gave just one example of how the timeExecution() command can be used to make your tests more insightful, of course there are many ways to use this versatile feature. Consider implementing it in your next test to clearly see how long specific functions and flows take to complete for participants in larger tests or with different configurations.
Additionally, keep your eyes open for future updates for timeExecution() functionality. In the future, it will be possible to add asserts for specific timeExecution() functions directly from the new test creation UI. Furthermore, it will be possible to see aggregators for each timeExecution() function’s durations similarly as it is available now for machine metrics and WebRTC stats. If you are not sure how to use this new Loadero command in your tests, but would like to do it, feel free to contact us for support.


