

Intro
Have you ever wondered, while manually creating tests in Loadero, that it would be nice to have some library that you can use to create tests programmatically? Sounds nice, isn’t it? Well, luckily, Loadero does have this option now. In this blog post I would like to introduce you to the recent creation of Loadero’s team — Loadero Java library.
This Java library utilizes Loadero’s API to provide you with convenient programmatic calls that allow you to read, copy, create, update, delete and launch tests. The same operations, except for launch, are available for things like asserts, preconditions (if your subscription plan allows them), test’s groups and participants. Moreover, you can retrieve all the relevant information regarding the tests that you may need i.e. test’s results or test’s runs.
To give a better understanding of why this is a cool feature that you may use in your next or current project, we are going to implement a little project to show you the current possibilities of this library in action in this blog post. And just between us, this is something similar, although simplified for the sake of the example, to what some of our internal teams are considering doing, but shush.
As a side note, this Java library supports only the paid plan projects, because you cannot get an API token with the trial version.
Before we begin our journey into programmatic interaction with Loadero’s API, you should have the following things set up. If, however, you just want to read the article, feel free to skip the Prerequisites section.
Prerequisites
- This blog post assumes that you know the basics of Java 8 and how to get started with the Maven project. You can use other build tools such as Gradle, but in this blog post’s example we are going to use Maven.
- If you would like to follow along, then you should have an API token for Loadero. Contact support to receive one.
- It is also assumed that you already have an existing project in Loadero with JavaScript + Nightwatch setup, you can follow this guide to get started.
- You also know how to create a script for Loadero. For more information you can refer to this blogpost:
Project idea
Let’s assume the next use case. We need to read some JSON files that contain settings for the test, test’s group and group’s participants and create a test based on that configuration files. For example, these configuration files may contain information such as in what mode to run the test, what increment strategy to use, how many groups we need, what participant’s settings should be. For simplicity’s sake, let’s just have 3 separate JSON configuration files for the test, group and participant respectively.
So, with an idea in place, let’s begin.
Maven Project Setup
For this example we are going to use the Maven project, but since this is a Java library, you can pretty much use any other building tool, for example, Gradle. Moreover, since Java is a JVM-based language, this enables us to call this library from any other JVM-based language like Scala or Kotlin. So, feel free to experiment with other languages as well.
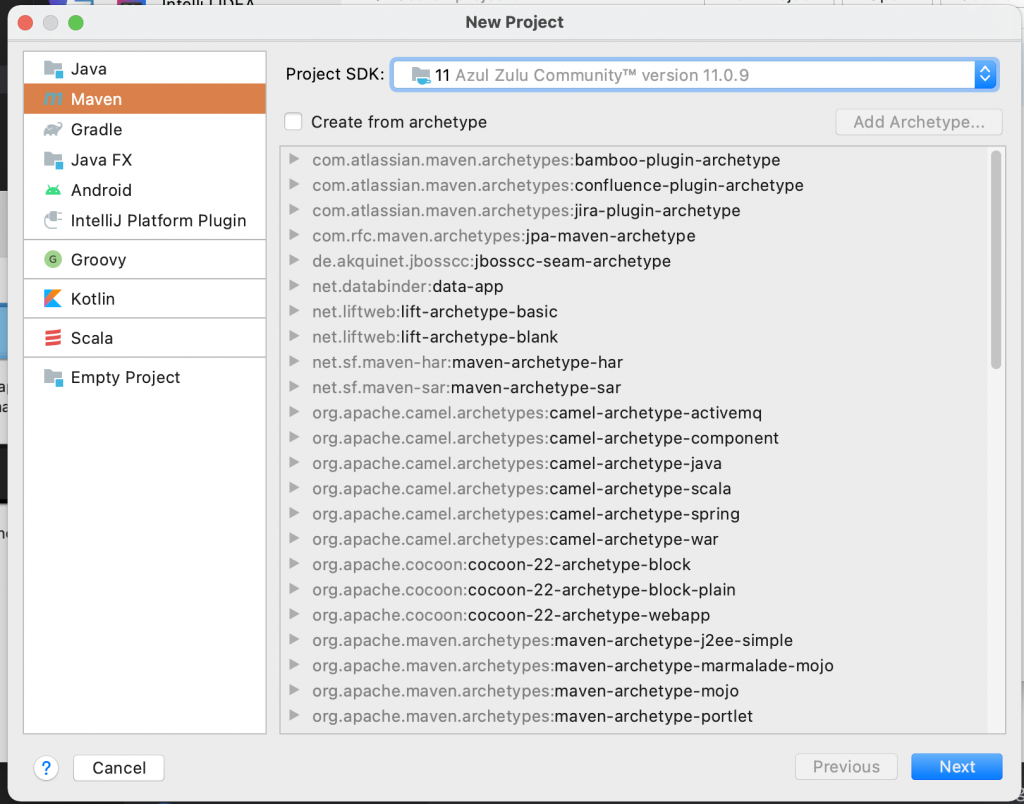
Like with most of the Java projects these days we are going to use Intellij IDEA to create a new Maven project. In this project we will use Java 11, but you can pick whichever Java version you prefer as long as it’s version 8 or above (in 2021 no one should be using anything that is below Java 8).
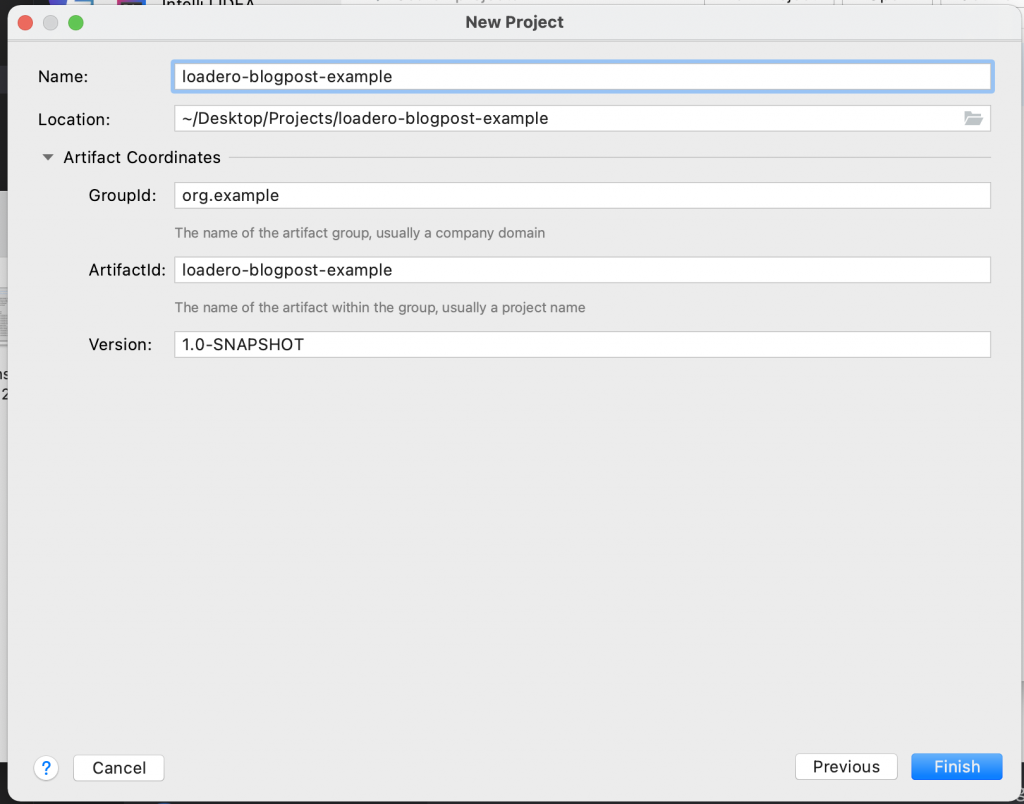
Next give it an appropriate name and specify your folder of choice.
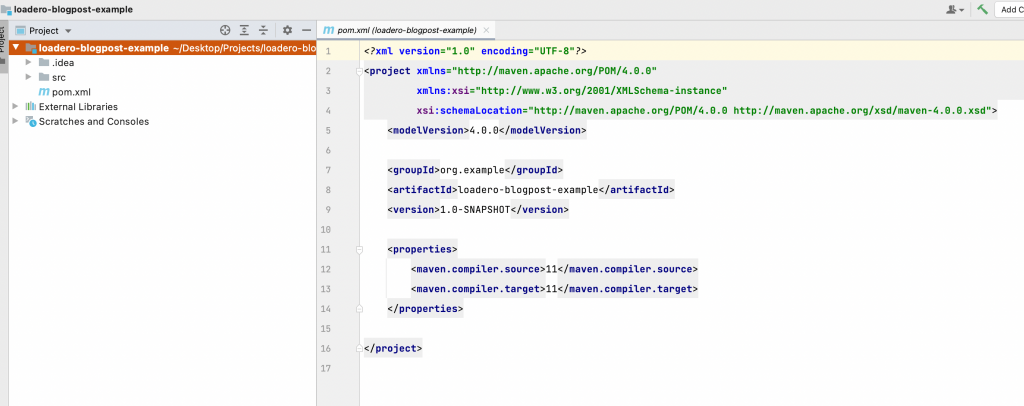
And this is what the new Maven project should look like.
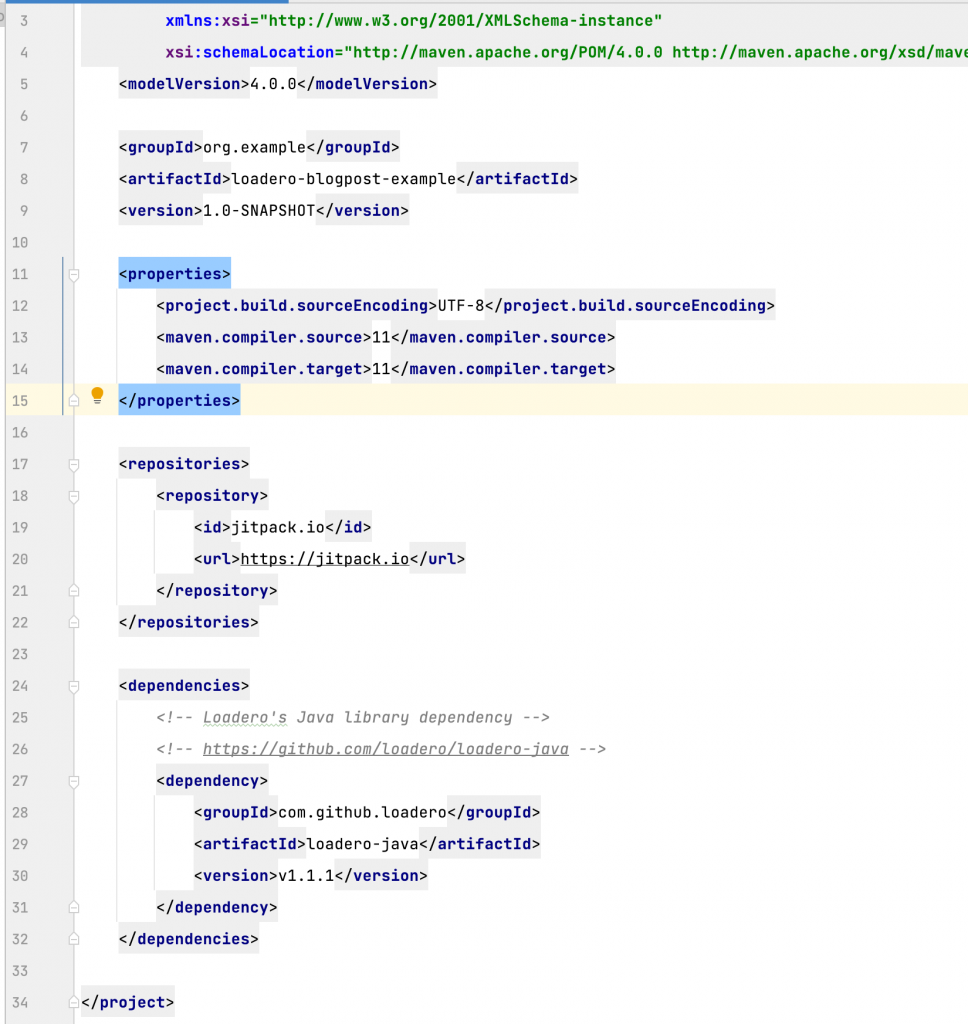
Now we need to get all the necessary dependencies for this project. The first one is the obvious one, we are going to add Loadero’s Java library. Since this library doesn’t reside on the Maven Central Repository, we need to include the external repository’s information to our pom.xml. Loadero is using Jitpack to host its library, a very convenient alternative to Maven Central Repository. Also, there you can find how to add this java library to your project. Here, take this shortcut to get the latest version of the Loadero’s library. Copy necessary information and paste it to your pom.xml. At the end of this step, you should have something like this:
For the sake of space I am going to omit the screenshots of me adding other dependencies and will just post a link to the final pom.xml file.
Next we need to add a dependency for serialization and deserialization of JSON files. We are going to use GSON, this is a library provided by Google, but there are also other alternatives that you can freely use such as Jackson.
And finally we are going to add Junit 5 dependencies to write unit tests for our little project. You can find the final pom.xml example here.
With all that our setup phase should be finished. Now let’s get to the implementation.
Implementation
JSON files
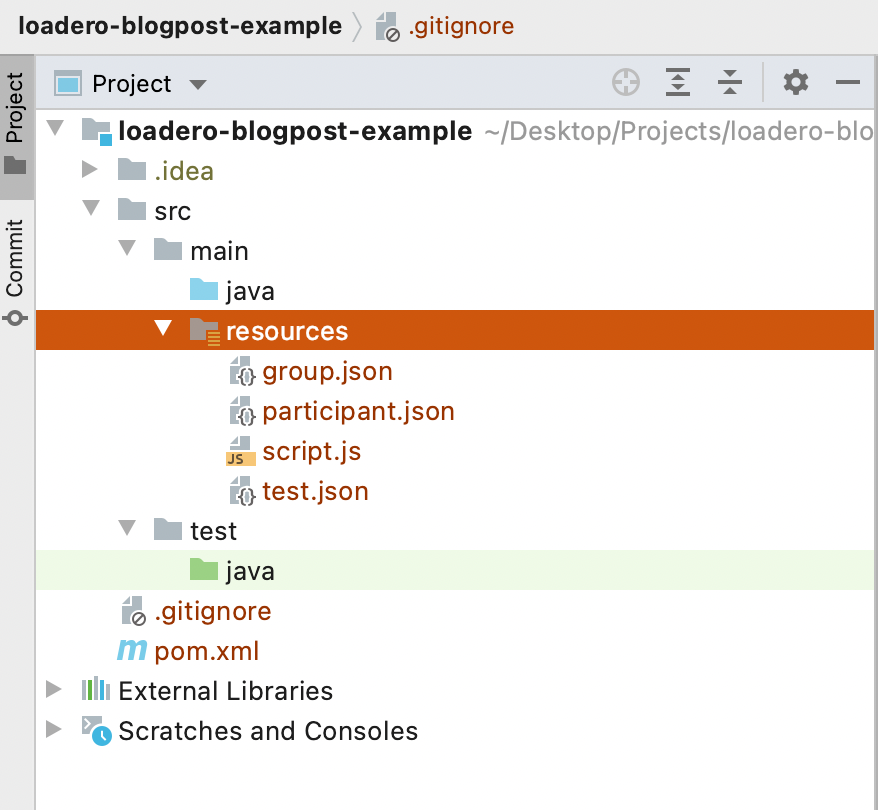
First let’s define the JSON configuration files that we are going to use to create the test, group and its participants. In the src/main/resources create test.json, group.json and participant.json files. Our configuration options will be stored in them. Also, in the same directory you can add a JavaScript file where our script for the test will be located. So, the current structure should be something like this:
Now let’s define JSON schemas that we are going to use. Since these are our configuration files, we can pretty much define them as we wish, but as a rule of thumb, we should keep .json files consistent with web UI fields to avoid any confusion and simplify the serialization process. With that in mind your JSON files should have the following structure:
test.json
Since scripts can vary in size, it is best to keep them in separate files and just to provide a path to the file. Here we achieve it with script_path field.
{
 "title": "somename",
 "test_mode": "load",
 "increment_strategy": "linear",
 "start_interval": "00:00:20",
 "participant_timeout": "00:03:20",
 "script_path": "src/main/resources/script.js"
}
group.json
{
 "title": "group1",
 "count": 2
}
participant.json
{
 "title": "participant1",
 "count": 2,
 "compute_unit": "g1",
 "browser": "chromeLatest",
 "location": "us-west-2",
 "network": "3g",
 "media_type": "default"
}
script.json.
This is just a code I took from Loadero’s Wiki page with script examples.
client => {
    // Example of locating elements using CSS selectors
    client
        // Navigate to website bing.com
        .url("https://www.bing.com")
        // Wait up to 10 seconds until page is visible and take a screenshot
        .waitForElementVisible('.dimmer', 10 * 1000)
        .takeScreenshot("bing.png")
        // Type 'QA Processes' in the search bar and press 'Enter'
        .waitForElementVisible("[type=search]", 10 * 1000)
        .setValue("[type=search]", ["QA Processes", client.Keys.ENTER])
        // Wait up to 10 seconds until search results are visible and take a screenshot
        .waitForElementVisible("[aria-label='Search Results']", 10 * 1000)
        .takeScreenshot("search_results.png");
}
Java classes for JSON serialization
Now let’s define models that will be used for serialization and deserialization of JSON files. In addition, we created a FileUtils class with a static method readFile() to help us read JSON files into the string that later can be used for serialization. Code for that can be obtained from the repository.

Now let’s add fields to Java classes we just created. For simple serialization/deserialization field
names should be matched exactly as in your JSON files otherwise use @SerializedName annotation to provide a specific name for which GSON should look in JSON file to map it to the respective field in Java class. For readability, we will omit constructors and getters/setters in this post. You can see the full code in the repository.
Let’s begin with the group as this is the most simple class in our project. This class will only have two fields: title and count. And this matches exactly the JSON file we created previously.
As we are not planning to make our classes inheritable, this is a good practice to make them final in order to tell other developers that this class was not designed to be inherited.
public final class GroupConfig {
 private String title;
 private int count;
 ...
Now, participant and test classes are going to be a little more complex. For these classes we are going to use some Enum types provided to us by Loadero’s library. These Enum types guarantee us type safety of our fields to some extent.
So, let’s take a look at what is happening in this ParticipantConfig class of ours. Title and count are pretty straightforward, so we can jump right to the computeUnit field. As we can see, this field has its own type which is the com.loadero.types.ComputeUnit type. This is Enum which provides all compute unit options by the Loadero.
Next is com.loadero.types.BrowserLatest Enum. This one contains only two constants CHROME_LATEST and FIREFOX_LATEST. This enum is good to use when we don’t really care about a specific version of the browser, but rather want our test to just run. com.loadero.types.Location enum type that is used for the location field as with com.loadero.types.ComputeUnit provides us with all the geo-locations available in Loadero. Similarly to two other fields the com.loadero.types.Network and com.loadero.types.MediaType enums contain all options that can be found in Loadero for the type of network and media respectively.
Since Java’s naming convention uses camelcase style and our JSON has names with underscore, we need to specify separately what kind of JSON field should be mapped to Java class’s field, hence here we are also using @SerializedName annotation provided by GSON.
public final class ParticipantConfig {
 private String title;
 private int count;
 @SerializedName("compute_unit")
 private ComputeUnit computeUnit;
 private BrowserLatest browser;
 private Location location;
 private Network network;
 @SerializedName("media_type")
 private MediaType mediaType;
 ...
Our final model will be TestConfig which, as expected, should be mapped to the test.json file. Here again we are given Enum types, such as TestMode and IncrementStrategy. As names imply, those two contain options for modes in which to run tests and which type of increment strategy to use. The rest startInterval and participantTimeout fields are marked as String for simplicity sake. However, in a production environment you probably should make them some type that deals with timestamps, for example, Duration or LocalTime class for such cases.
public final class TestConfig {
 private String title;
 @SerializedName("test_mode")
 private TestMode testMode;
 @SerializedName("increment_strategy")
 private IncrementStrategy incrementStrategy;
 @SerializedName("start_interval")
 private String startInterval;
 @SerializedName("participant_timeout")
 private String participantTimeout;
 @SerializedName("script_path")
 private String scriptPath;
 ...
Putting everything together
Writing models is nice and simple, but do they actually work? We should create some tests to check whether or not we can serialize our JSON files into Java classes! Once again for saving some space we will only paste one unit test as they will be all similar. Other tests and other code can be found in the repository.
public class TestModels {
  private final Gson gson = new GsonBuilder().create();
  private final String testConfigJsonPath = "src/main/resources/test.json";

  @Test
  public void serializeTestConfig() {
     String testConfigJson = FileUtils.readFile(testConfigJsonPath);
     Assertions.assertNotNull(testConfigJson);
     Assertions.assertFalse(testConfigJson.isEmpty());

     TestConfig testConfig = gson.fromJson(testConfigJson, TestConfig.class);
     Assertions.assertNotNull(testConfig);
     Assertions.assertEquals(TestMode.LOAD, testConfig.getTestMode());
}
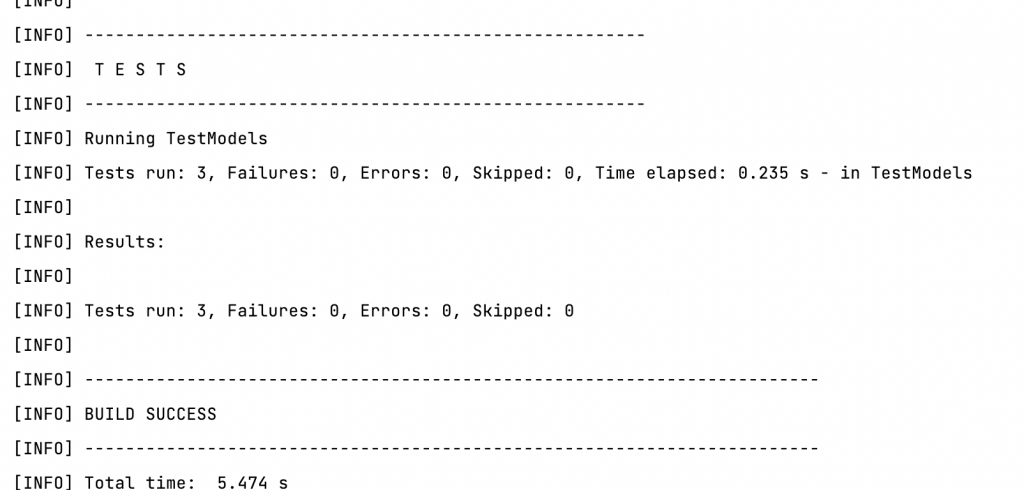
And using a simple mvn test command we can launch all the tests in the src/test/java directory and see that our tests have been passed.
So, now that we know our models are working perfectly fine for this job, we can proceed further and try to create tests in Loadero. The logic for that will be created as a unit test just to show you how it can be done. A lot of code is coming, so bear with me.
At the top of the class we are defining some constant variables like the path to the JSON files, GSON instance that is going to be used for serialization and Loadero’s API token and project’s ID. In the body of the createTest() method, first we call Loadero.init() with the token and project’s ID specified. This initiates a Loadero instance that allows later to make CRUD calls. Next with our previously created FileUtils class we read content of .json into String and later pass it to gson.fromJson() to serialize JSON file into TestConfig class.
Here we also need to parse the Start interval and Participant timeout manually from String into Duration class, as this is what TestParams requires us to provide.
Now about TestParams class. All models provided by Loadero’s library i.e. Test, Group, Participant, Assert and Precondition have respective builder classes with the suffix **Params. This builder class is used to create a “list of parameters” for a respective model, which later will use this list to create or update an instance of this model in Loadero. Next we are passing testParams to a Test.create() method. This is a static method so it can be called without assigning to a variable, but since we need a test ID to create a group later for this test, we assign it to the variable to get a Test instance with all the relevant information. And just to confirm, that our test was indeed created according to the test.json file we put some assert statements.
public class TestMain {
 private final String testConfigJsonPath = "src/main/resources/test.json";
 private final String groupConfigJsonPath = "src/main/resources/group.json";
 private final String participantConfigPath ="src/main/resources/participant.json";
 private final Gson gson = new GsonBuilder().create();
 private final String token = System.getenv("LOADERO_API_TOKEN");
 private final int projectId = Integer.parseInt(System.getenv("LOADERO_PROJECT_ID"));

 @org.junit.jupiter.api.Test
 public void createTest() throws IOException {
   Loadero.init(token, projectId);

   String testConfigJson = FileUtils.readFile(testConfigJsonPath);
   TestConfig testConfig = gson.fromJson(testConfigJson, TestConfig.class);
   Duration startInterval = Duration.ofSeconds(LocalTime.parse(testConfig.getStartInterval()).getSecond());
   Duration participantTimeout = Duration.ofSeconds(LocalTime.parse(testConfig.getParticipantTimeout()).getSecond());
   TestParams testParams = TestParams.builder()
           .withName(testConfig.getTitle())
           .withMode(testConfig.getTestMode())
           .withIncrementStrategy(testConfig.getIncrementStrategy())
           .withScript(testConfig.getScriptPath())
           .withStartInterval(startInterval)
           .withParticipantTimeout(participantTimeout)
           .build();
   Test test = Test.create(testParams);
   Assertions.assertEquals(testConfig.getTestMode(), test.getMode());
   Assertions.assertEquals(testConfig.getTitle(), test.getName());
   Assertions.assertEquals(testConfig.getIncrementStrategy(), test.getIncrementStrategy());
Next we need to create a group. The process is similar to the creation of a test with one exception. Here we need to provide a test ID of the freshly created test. This can be obtained by calling the .getId() method on the test variable. This must be provided so Loadero would know for which test to create a group.
String groupConfigJson = FileUtils.readFile(groupConfigJsonPath);
GroupConfig groupConfig = gson.fromJson(groupConfigJson, GroupConfig.class);
GroupParams groupParams = GroupParams.builder()
       .withTestId(test.getId())
       .withName(groupConfig.getTitle())
       .withCount(groupConfig.getCount())
       .build();
Group group = Group.create(groupParams);
Assertions.assertEquals(groupConfig.getTitle(), group.getName());
Assertions.assertEquals(groupConfig.getCount(), group.getCount());
And finally every group needs participants. Here also we need to provide a test ID and a group ID so Loadero would know where to create new participants. Other than that, the process of creation is similar to the previous ones.
String participantConfigJson = FileUtils.readFile(participantConfigPath);
ParticipantConfig participantConfig = gson.fromJson(participantConfigJson, ParticipantConfig.class);
ParticipantParams participantParams = ParticipantParams.builder()
       .withTestId(test.getId())
       .withGroupId(group.getId())
       .withName(participantConfig.getTitle())
       .withComputeUnit(participantConfig.getComputeUnit())
       .withNetwork(participantConfig.getNetwork())
       .withLocation(participantConfig.getLocation())
       .withBrowser(new Browser(participantConfig.getBrowser()))
       .withMediaType(participantConfig.getMediaType())
       .withCount(participantConfig.getCount())
       .build();
Participant participant = Participant.create(participantParams);
Assertions.assertEquals(participantConfig.getTitle(), participant.getName());
Assertions.assertEquals(participantConfig.getCount(), participant.getCount());
Assertions.assertEquals(participantConfig.getComputeUnit(), participant.getComputeUnit());
So, with all the logic in place, let’s execute and see what happens!
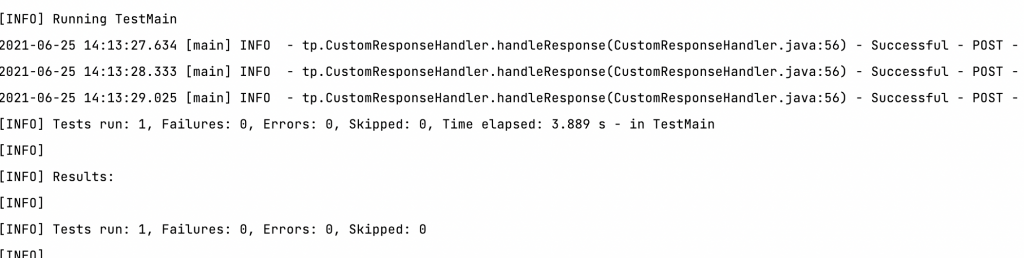
According to the console, everything seems to be good. Let’s double-check the website.
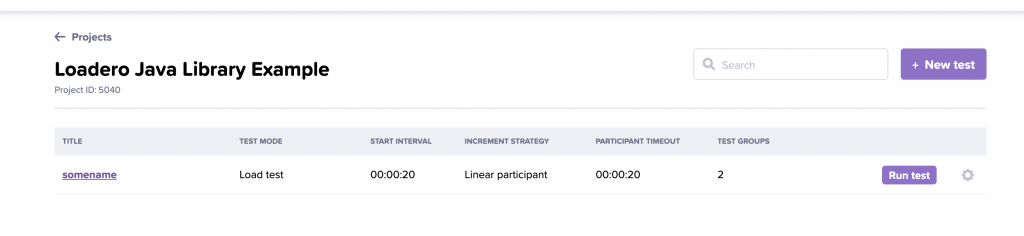
And as we can see, the test is created and ready to launch.
You’re probably thinking: “Duh, I don’t want to access web UI to launch a test…” and you don’t have to! This java library provides the Test.launch(testId) method to launch your freshly created test. This method will return a TestRun instance from which you can get runId. Then you can pull for the test’s run information with TestRun.poll(testId, runId, durationInSeconds). When the test is done it will return an instance of TestRun with status RunStatus.DONE and all the information about this run, if however, the test fails for some reason, it will return a TestRun instance with a status field indicating what caused the failure.
Conclusion
In this blog post we covered quite a lot of information about how to get started with Loadero’s Java library. There is obviously a lot more you can do and a lot more use cases to cover. But for now, the goal is to give you, dear reader, an example of what this library is capable of and how to use it on the basic level. The full code of the project is available in this repository.


