

If you are the only person in Loadero project, sure you have all the permissions possible for this project, but Loadero is used by various sized teams. For a small QA team or large scale enterprise, that utilizes Loadero for filling testing needs, setting member permissions can be very important. There might be a time when a new team member has arrived and should be invited to the Loadero project. Possibly this member should have limited privileges to avoid unexpected project settings and test changes. Another example of the permissions use is giving read-only access for stakeholders to view various graphs in result reports This is why there are three levels of project member permissions in Loadero.
By setting correct member permissions for each member it is possible to avoid broken tests and unexpected running costs. These permissions are set only for a single project and are not system-wide. By default, the project creator gets the highest level of permissions – administrator. The remaining two permission levels get inferior permissions, the middle-level being developer and the lowest visitor.
Member permission roles explained
- Administrator – This is the highest member role available. Administrators have permission to do anything within that project, that also includes changing other member permissions and even removing them from the project. There always must be at least one member in a project with
administratorrole at any given time. - Developer – Being a developer gives you most of the privileges which are available to the
administrator. This includes creating, editing, running and deleting tests. The only functionality that is not available for this role is altering the project settings. This role is the most suitable for regular Loadero users who will be managing tests. - Visitor – Being a visitor in a project, gives read-only permissions without any possibility to create, edit or delete any resources within this project. Most suitable for temporary users or stakeholders to view test results.
To see the full list of allowed actions for each member role, check out our wiki page about it here!
Setting permissions

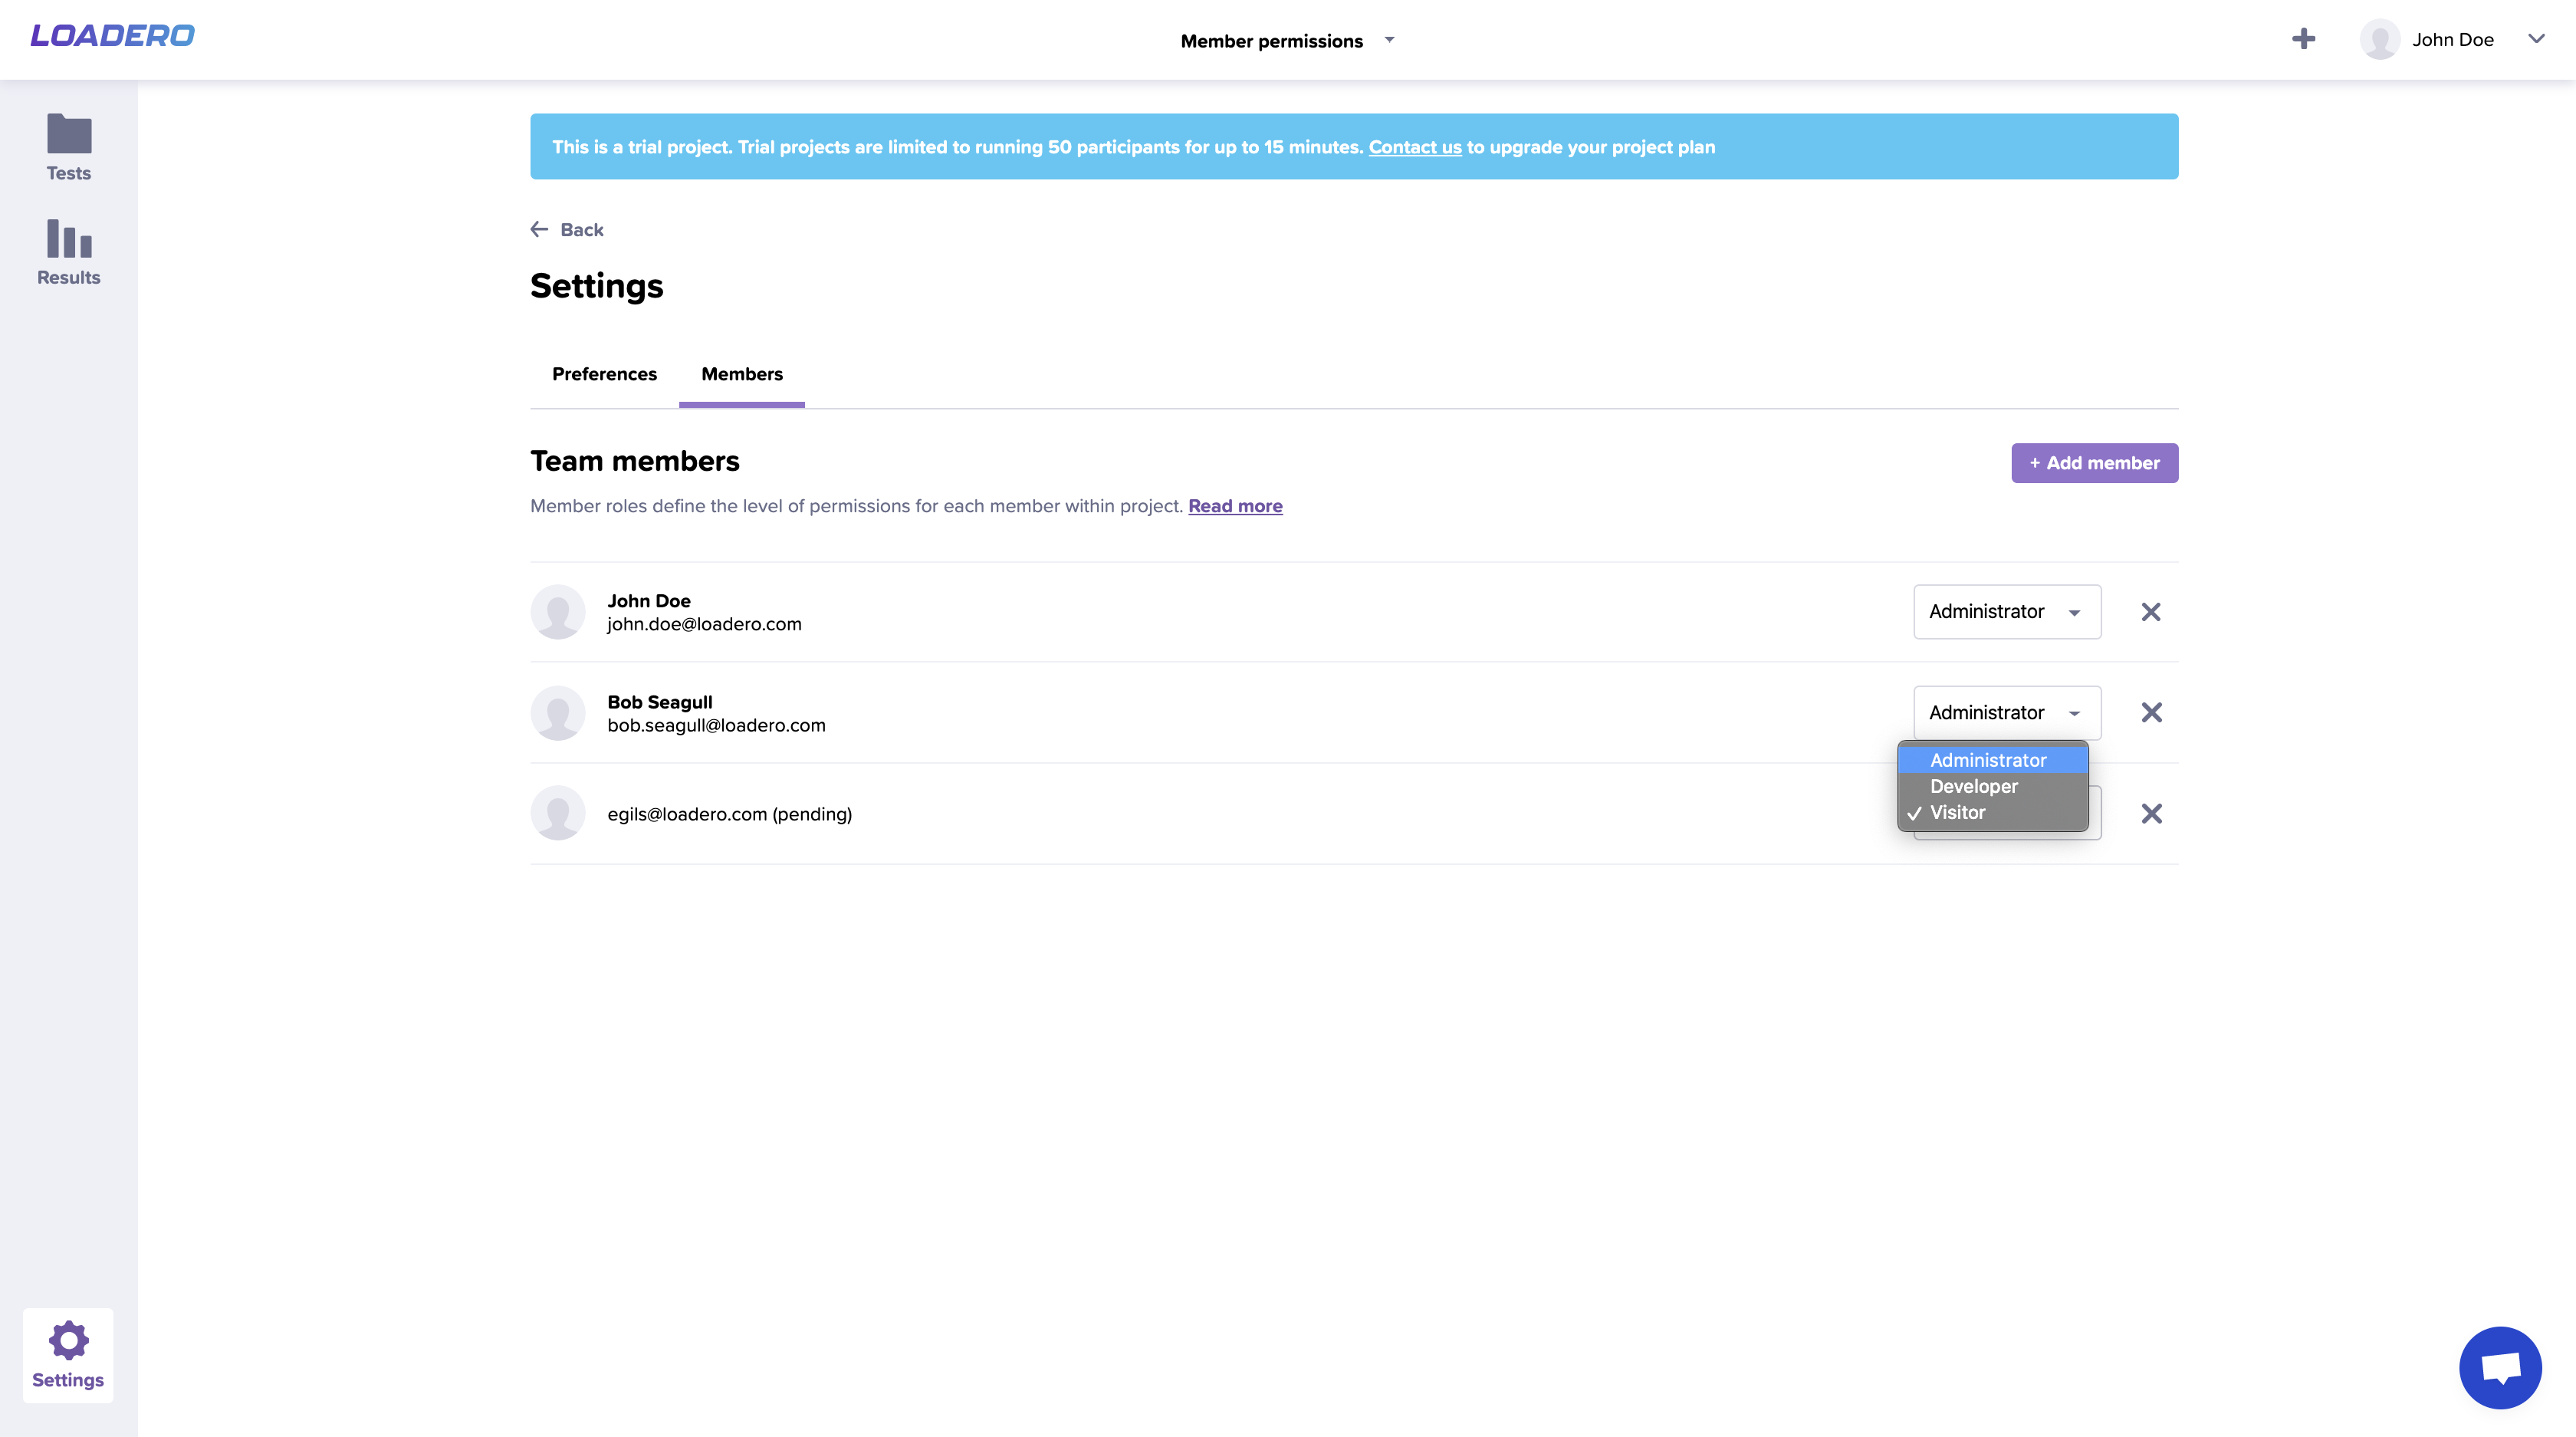
Member permissions can be changed in general project settings. To access these settings click the little cogwheel at the bottom of the left side menu, then navigate to the Members tab to see all project members and their permissions.

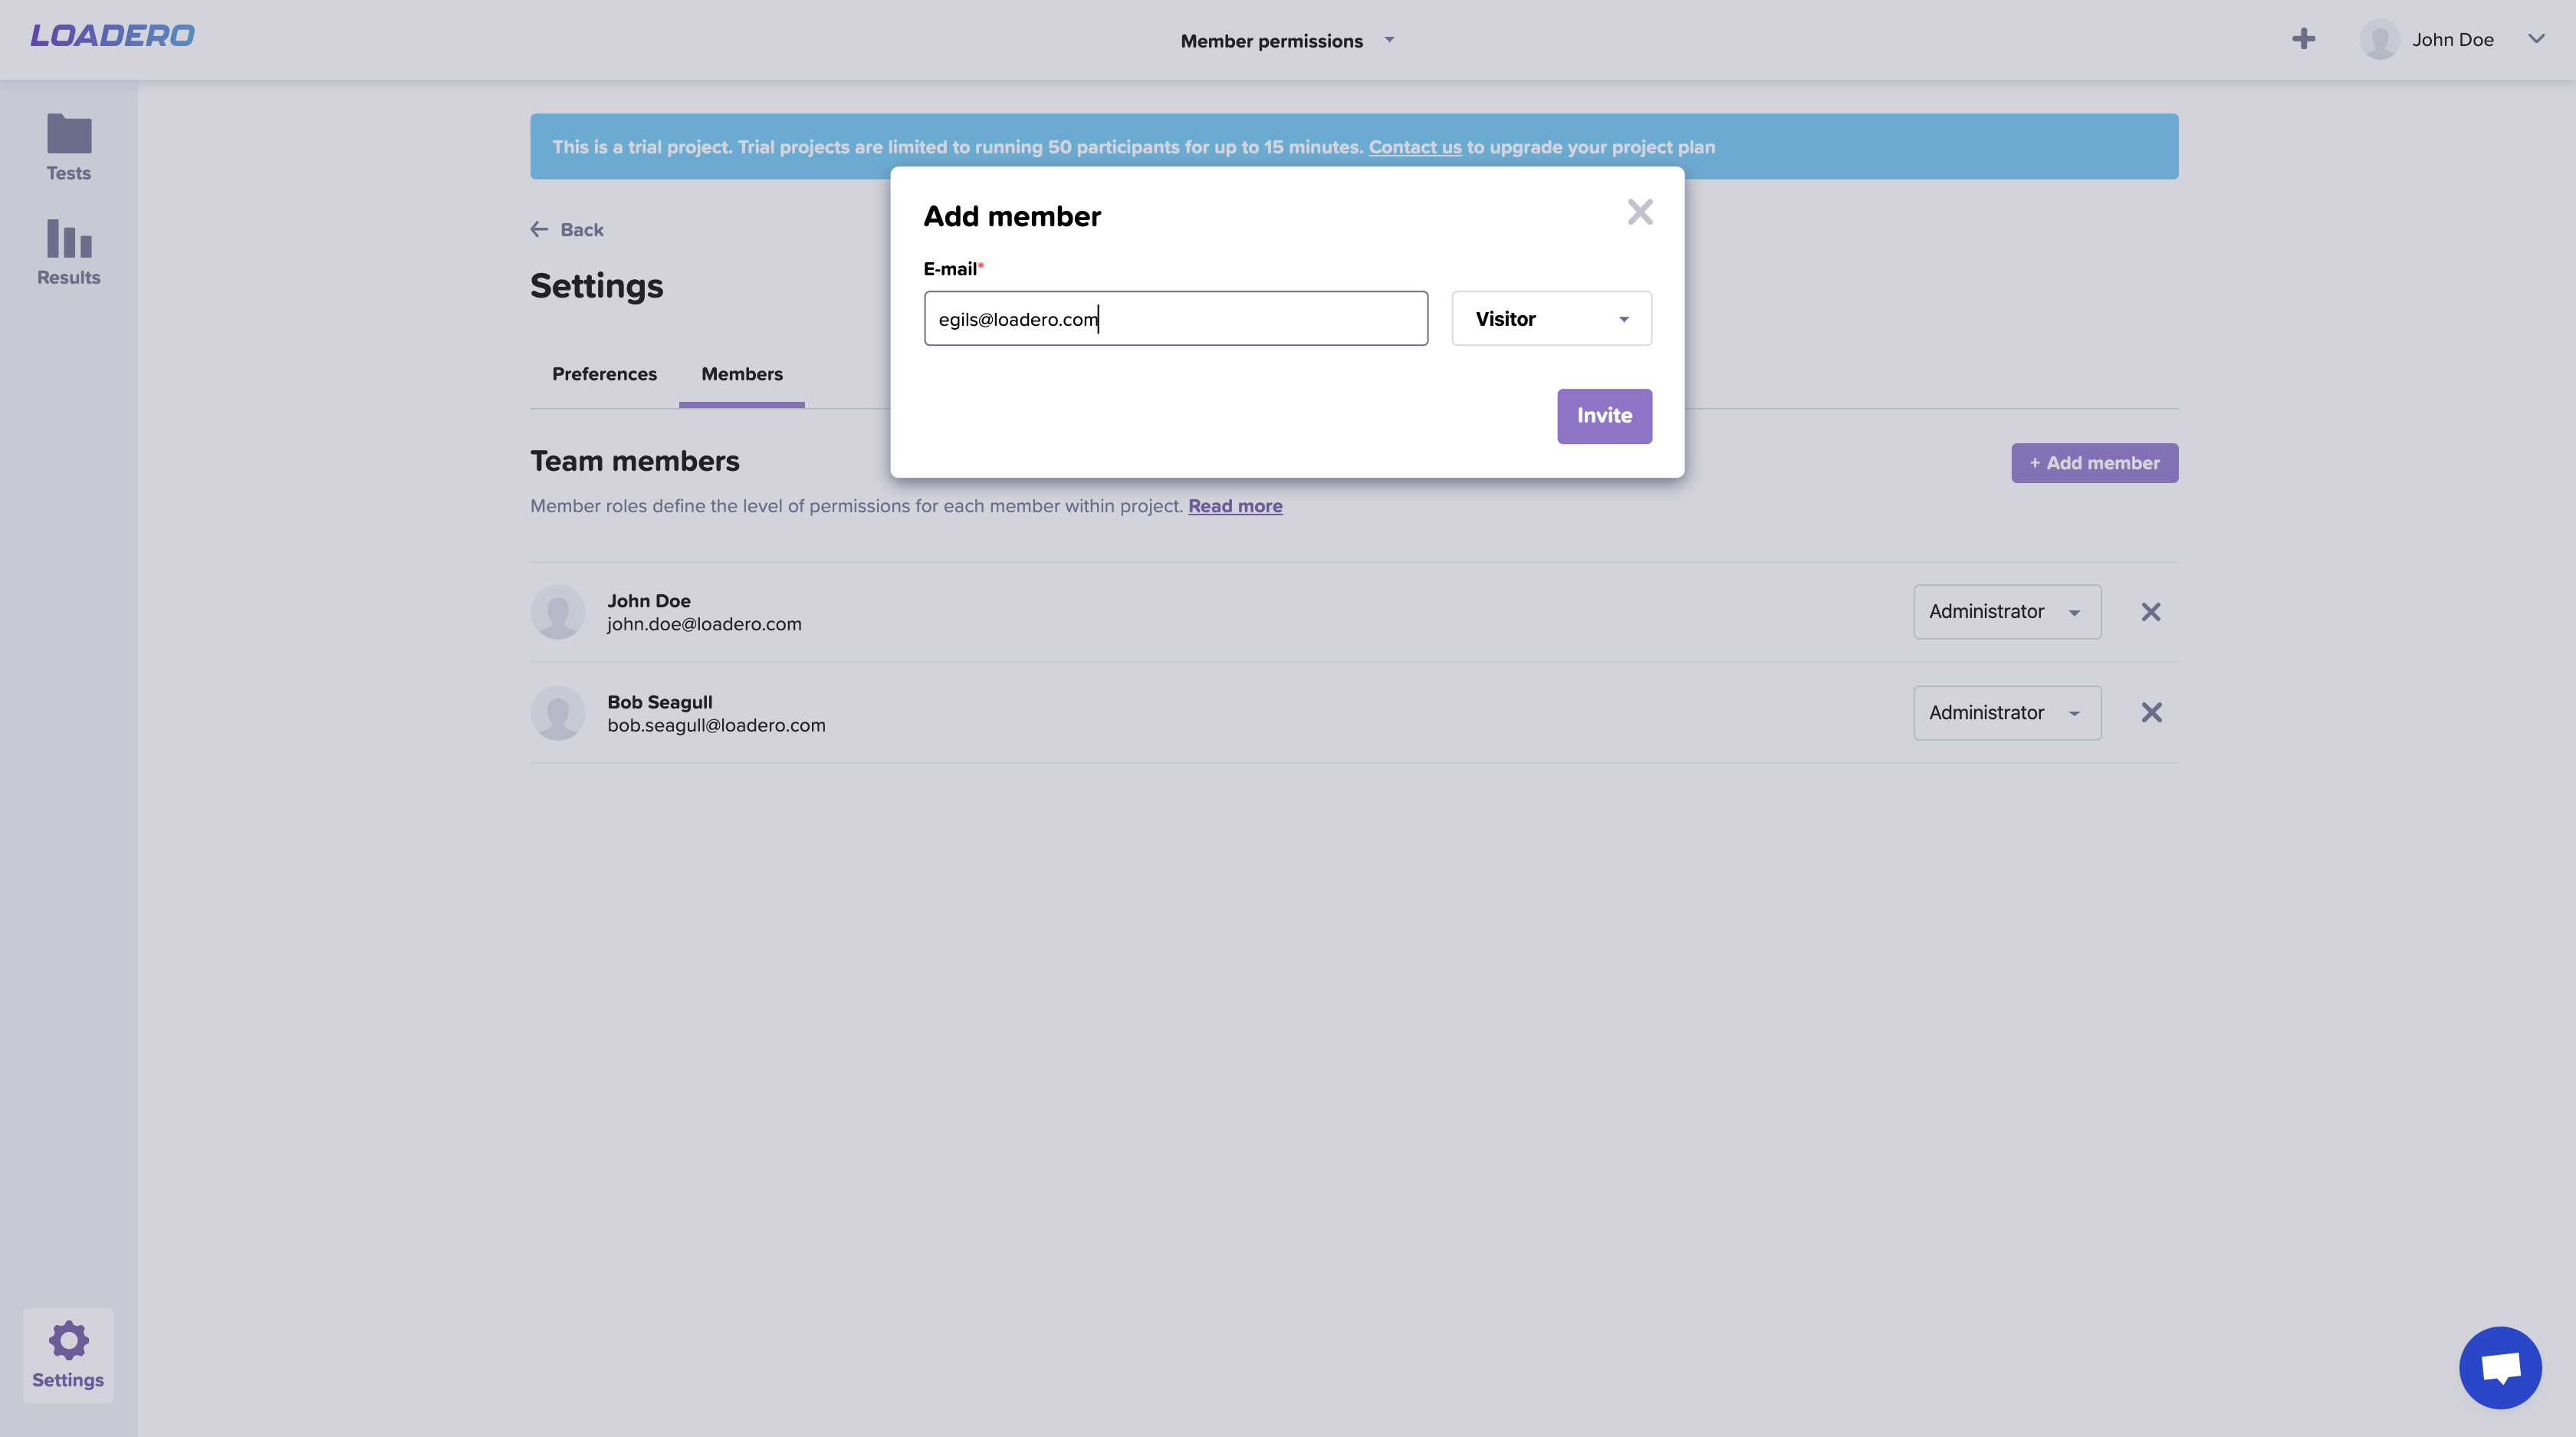
Member permissions also have to be set when inviting new people to the project. If no other role is selected from the dropdown, then the newly invited member will have the visitor role. No worries, that can be changed later, but think carefully if this member should have more permissions.
To change the permissions, just change the value from the dropdown menu, everything will be saved instantly. The dropdown can be found on the right side of every member row.
Oftentimes you need to collaborate on the same project and to give different permissions to each member, the most popular being developer because this role has all privileges related to testing. We would like to suggest setting the administrator role only when necessary, to avoid unnecessary changes to the project settings, that could include billing information and custom AWS setup. Visitor role should be used when the member should not be able to create, edit or run tests. Even a free trial subscription project allows an unlimited number of people to work on it and view results. So if you are just starting to work with Loadero, make sure to set permissions correctly, if you are not working alone.


