Loadero API allows managing and running tests just as one would via the Loadero web application. However, sending an HTTP request every time a test needs to be created, updated, or run can become cumbersome. We already had a Java client, which makes the processes easier, and now Loadero team has been hard at work creating a new client and we are proud to present – Loadero-Python.
The library provides the same functionality as Loadero’s API – create, read, update and delete different resources in a nice programmatic way. Additionally, it handles authorization and rate limits in the background, so that you can focus on the important stuff.
This blog post will showcase a few practical Loadero-Python use cases, such as
- saving test configurations for version control
- updating test configurations from version control
- running tests as a part of a CI
Setup
Before getting started we will need to create an environment. This will consist of three parts
- a Loadero project with an API access token. Project access tokens
can be acquired on your project’s settings page in the web app. - a GitHub repository – a place where we will save the scripts and test
configurations. GitHub also provides a CI/CD platform – actions that are freely
accessible to everyone, which will be used to demonstrate the scripts in
action - a working Python environment with Loadero-Python installed
After acquiring an API access token, create a new GitHub repository or choose an already existing one. In it, create a new Python virtual environment with
python -m venv venv
You may need to run python3 instead of python depending on what Python setup your machine has.
This will create a directory venv that shouldn’t be published to your version control system, so don’t forget to add it to the .gitignore file.
Now activate the created environment and install Loadero-Python.
source venv/bin/activate
Loadero-Python is available on PyPI, so the installation is a simple pip command call.
pip install loadero-python
Loadero-Python is an open-source project and its source code can be found on GitHub, so if you notice any issues or have a feature request feel free to contribute or open an issue.
Now that we are all set up let’s get coding with the first example.
Saving test configuration with Python client
Let’s create a Python script using the just-installed Loadero-Python library to save all of the project’s test configurations to a file.
Create a directory configs that will keep the test configurations and a file save.py and add the necessary imports the script will use.
import json
import os
from loadero_python.api_client import APIClient
from loadero_python.resources.project import Project
Then initialize the Loadero-Pythons API client with the project id and access token.
project_id = os.environ.get("LOADERO_PROJECT_ID", None)
access_token = os.environ.get("LOADERO_ACCESS_TOKEN", None)

if project_id is None or access_token is None:
    raise Exception(
        "Please set the LOADERO_PROJECT_ID and LOADERO_ACCESS_TOKEN "
        "environment variables."
    )

APIClient(
    project_id=project_id,
    access_token=access_token,
)
Tip: While it might be tempting to hard code the project_id and access_token values, it is good practice not to publish such sensitive information to your version control system even if the repository is a private one. So here we are retrieving the values from the script caller environment.
Since test resources are a sub-resource of the project and groups are a sub-resource of the test and participants are a sub-resource of the group, three nested for loops are enough to retrieve all of the configurations.
Additionally, each test script needs to be read and written to a file, saving the file path in the test configuration.
tests = []
for test in Project().tests()[0]:
    test.params.script.read()
    script_filepath = f"configs/test_{test.params.test_id}_script"
    with open(script_filepath, "w") as f:
        f.write(test.params.script.content)

    test_conf = test.params.to_dict_full()
    test_conf["script_filepath"] = script_filepath
    groups = []

    for group in test.groups()[0]:
        group_conf = group.params.to_dict_full()
        participants = []

        for participant in group.participants()[0]:
            participant_conf = participant.params.to_dict_full()
            participants.append(participant_conf)

        group_conf["participants"] = participants
        groups.append(group_conf)

    test_conf["groups"] = groups

    tests.append(test_conf)
All that remains is saving the collected data to a file.
with open("configs/tests.json", "w") as f:
    json.dump(tests, f, indent=2)
The file name could be made configurable, but for simplicity’s sake, I will keep it hard-coded.
Run the script with
LOADERO_PROJECT_ID=xxx LOADERO_ACCESS_TOKEN=xxx python save.py
This should produce two or more files (depending on how many tests you have in your project) configs/tests.json and configs/test_{test_id}_script.tests.json files contents should look something like this:
[
  {
    "id": 17705,
    "name": "version controlled test",
    "start_interval": 5,
    "participant_timeout": 600,
    "mode": "load",
    "increment_strategy": "random",
    "created": "2022-11-19 09:50:08+00:00",
    "updated": "2022-11-19 09:50:08+00:00",
    "script_file_id": 173039,
    "group_count": 4,
    "participant_count": 16,
    "script_filepath": "test_17705_script",
    "groups": [
      {
        "id": 61827,
        "name": "group",
        "count": 4,
        "test_id": 17705,
        "total_cu_count": 4,
        "participant_count": 4,
        "created": "2022-11-19 09:50:22+00:00",
        "updated": "2022-11-19 09:50:22+00:00",
        "participants": [
          {
            "id": 123366,
            "test_id": 17705,
            "name": "participant",
            "count": 2,
            "compute_unit": "g1",
            "group_id": 61827,
            "record_audio": false,
            "audio_feed": "default",
            "browser": "chromeLatest",
            "location": "us-west-2",
            "network": "default",
            "video_feed": "default",
            "created": "2022-11-19 09:50:48+00:00",
            "updated": "2022-11-19 09:50:48+00:00"
          },
          {
            "id": 123367,
            "test_id": 17705,
            "name": "participant",
            "count": 2,
            "compute_unit": "g1",
            "group_id": 61827,
            "record_audio": false,
            "audio_feed": "default",
            "browser": "firefoxLatest",
            "location": "us-west-2",
            "network": "default",
            "video_feed": "default",
            "created": "2022-11-19 09:50:58+00:00",
            "updated": "2022-11-19 09:51:10+00:00"
          }
        ]
      }
    ]
  }
]
configs/test_{test_id}_script files should contain your project’s test scripts. In my case, it’s just a single file with a simple console log.
(client) => {
  console.log("hello world");
};
Updating test configuration with Python client
Now that we have a way to create test configurations of a project the created files can be committed to the repository. The files are a test configuration backup from which Loadero tests can be recreated manually. This can also be used to migrate or duplicate Loadero tests to another project easily. For projects with many large tests this can be quite tedious so let’s create a script to do this automatically.
Create a file update.py and add the following imports to it.
import json
import os
from loadero_python.api_client import APIClient
from loadero_python.resources.participant import Participant
from loadero_python.resources.group import Group
from loadero_python.resources.test import Test
The APIClient setup remains unchanged from the save.py script so it can be copied over.
First, we will need to load the tests.json file.
tests = json.load(open("configs/tests.json", "r"))
Similarly to save.py, iterating through each resource’s sub-resources allows us to update each resource in a nice structured manner.
Again, test resources need special handling – their corresponding script file needs to be loaded. Luckily, Loadero-Python provides a convenient way of loading scripts from files.
for test in tests:
    for group in test["groups"]:
        for participants in group["participants"]:
            p = Participant()
            p.params.from_dict(participants)
            p.update()

        g = Group()
        g.params.from_dict(group)
        g.update()

    t = Test()
    t.params.from_dict(test)
    t.params.script = Script(filepath=test["script_filepath"])
    t.update()
And that’s all we need. Make adjustments to your test configurations in configs/tests.json and/or configs/test_{test_id}_script and then run the script with
LOADERO_PROJECT_ID=xxx LOADERO_ACCESS_TOKEN=xxx python update.py
Check the Loadero web application to see the adjustments you have made.
Important: update.py script will fail if previously non-existent resources get added to the tests.json file. This happens because the .update() method can only update existing resources and will raise an exception if the target resource does not exist.
CI/CD automation with Python client
Continuous Integration (CI) and continuous development (CD) are very powerful tools that introduce automation of certain tasks to the stages of app development and testing. Commonly CI/CD pipelines are used to automate repetitive tasks of application development, deployment, or testing.
Having developed a script that automatically updates Loadero tests, let’s take a look at how it can be utilized in a CI/CD pipeline. As mentioned before, I will be using GitHub’s actions. Any other CI/CD platform can be used. The core concept remains unchanged, while the pipeline defining syntax may and most likely will be different.
GitHub workflows are kept in a directory .github/workflows at the root of the repository. Create it if it does not already exist.
There we will create an update-tests.yml file that will define the workflow that will run only when a merge to master or main branches happens and when changes to test configurations have happened. In combination, this allows for a review process to happen before changes to test configurations are applied in Loadero.
Let’s start by specifying the workflow’s triggers
name: Update Loadero tests in a project

on:
  push:
    branches:
      - main
      - master
  workflow_dispatch:
Additionally, I have named my workflow Update Loadero tests in a project and added another trigger workflow_dispatch – this will allow triggering the pipeline manually via GitHub web application if need be.
Next comes the first of two jobs – check-changes. The purpose of this job is to check if changes have happened to the test configurations. This is done by the action dorny/paths-filter@v2. In it, we specify the directory that the configurations are kept in. In my case, it’s quite a deeply nested directory python/src/loadero_python_showcase/configs, but for you, it likely will be different and closer to the repository’s root.
jobs:
  check-changes:
    runs-on: ubuntu-latest

    outputs:
      test-configs: ${{ steps.filter.outputs.test-configs }}

    steps:
      - uses: actions/checkout@v3
      - uses: dorny/paths-filter@v2
        id: filter
        with:
          base: ${{ github.ref }}
          filters: |
            test-configs:
              - 'python/src/loadero_python_showcase/configs/**'
The second job will run only if the first job detected a change in the configurations directory. This job will set up a python environment, install loadero-python and run the previously developed update.py script.
update-tests:
  needs: check-changes
  if: ${{ needs.check-changes.outputs.test-configs == 'true' }}
  runs-on: ubuntu-latest
  steps:
    - uses: actions/checkout@v3
    - uses: actions/setup-python@v4
      with:
        python-version: "3.10"
    - run: pip install loadero-python
    - name: "Update Loadero tests"
      run: |
        cd ./python/src/loadero_python_showcase
        python update.py
      env:
        LOADERO_ACCESS_TOKEN: ${{ secrets.ACCESS_TOKEN }}
        LOADERO_PROJECT_ID: ${{ secrets.PROJECT_ID }}
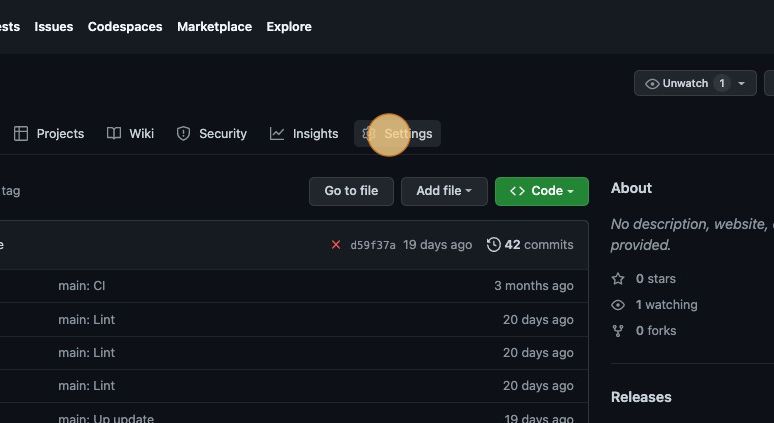
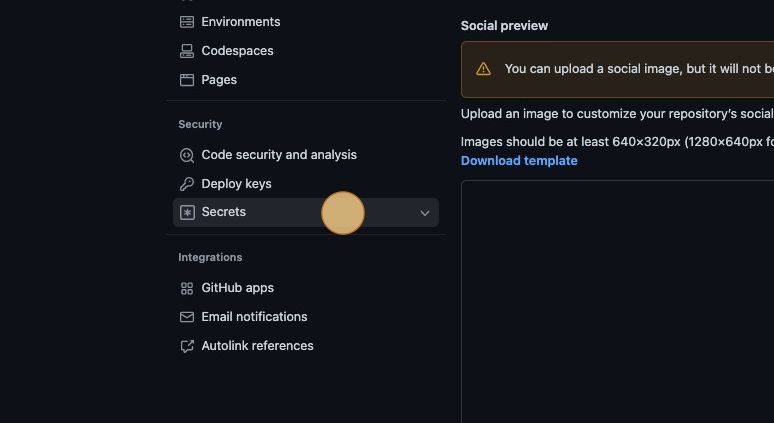
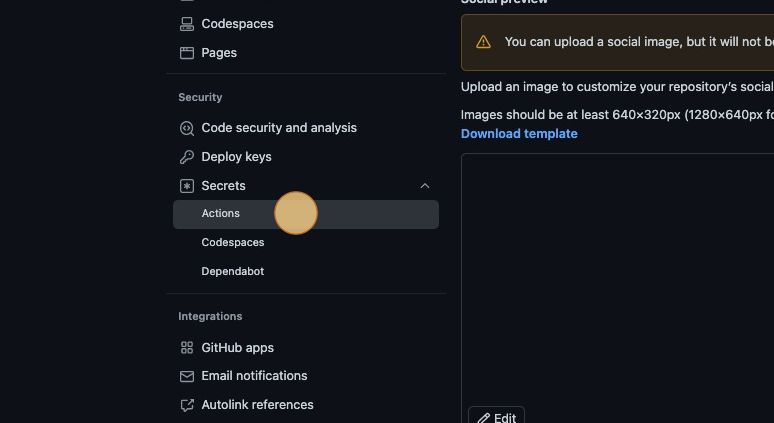
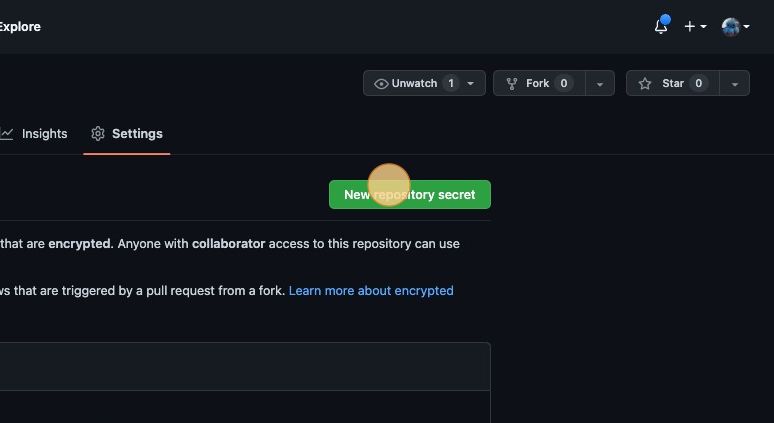
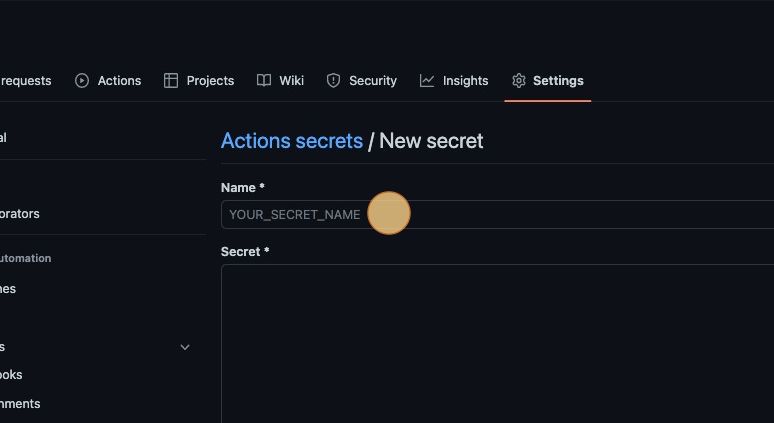
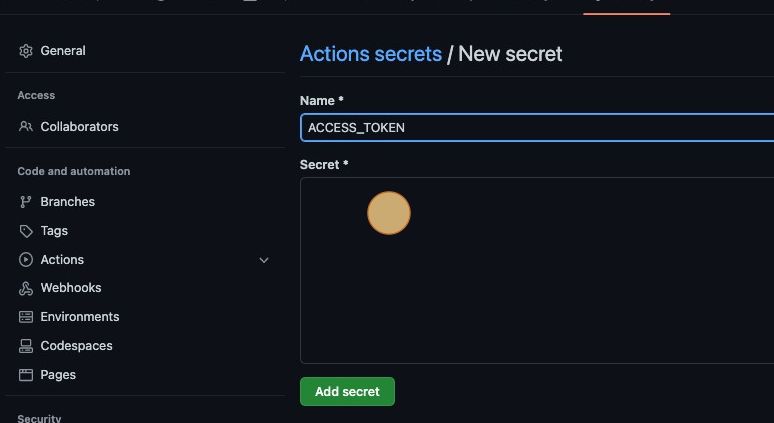
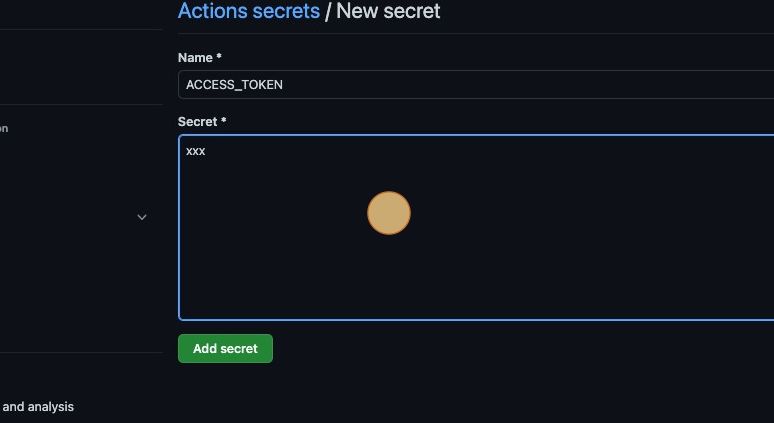
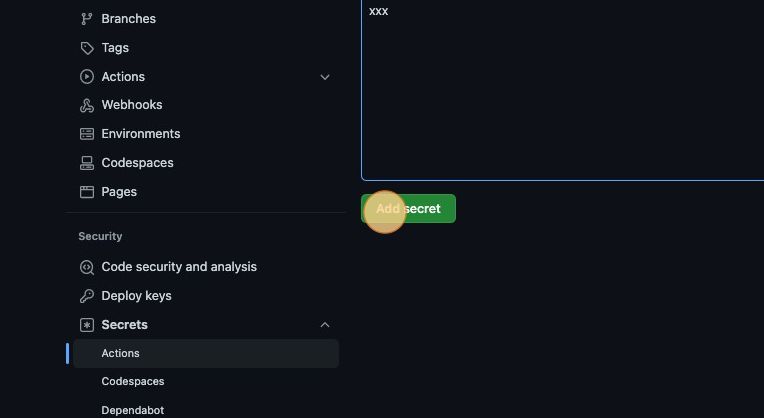
Tip: Notice that the LOADERO_ACCESS_TOKEN and LOADERO_PROJECT_ID are GitHub Actions secrets. This keeps your Loadero access token private. Secrets can be configured in the settings tab of the GitHub web application.
Running tests as a part of CI/CD
There is a post showing how Loadero’s API can be used to integrate your tests into a development pipeline, but Loadero-Python makes it even simpler to start/stop tests programmatically so let’s create a script that runs a test, waits for it to finish, and runs it as a part of CI/CD.
Create a new file called run.py and add the following imports
import os
from loadero_python.api_client import APIClient
from loadero_python.resources.test import Test
Again we will need to initialize the APIClient from the environment, but this time an additional environment variable LOADERO_TEST_ID is required. This will specify the test to run.
project_id = os.environ.get("LOADERO_PROJECT_ID", None)
access_token = os.environ.get("LOADERO_ACCESS_TOKEN", None)
test_id = os.environ.get("LOADERO_TEST_ID", None)


if project_id is None or access_token is None or test_id is None:
    raise Exception(
        "Please set the "
        "LOADERO_PROJECT_ID and LOADERO_ACCESS_TOKEN AND LOADERO_TEST_ID "
        "environment variables."
    )

APIClient(
    project_id=project_id,
    access_token=access_token,
)
And all that remains is running the test and polling for results. With Loadero-Python this can be achieved with an elegant one-liner.
run = Test(test_id=test_id).launch().poll()

print(run)

for result in run.results()[0]:
    print(result)

if run.params.success_rate != 1:
    raise Exception("Test failed")
After the test finishes execution we will print the test run and result for each participant. The script will raise an exception if one or more participants of the test failed. This will also fail the pipeline that we will set up next.
Create a new file run-test.yml in .github/workflows directory.
This workflow will be very similar to the previous ones’ second job with few exceptions – it will run on all pull_request events also allowing manual triggers and, instead of running update.py script, this workflow will run the just created run.py.
name: Run Loadero test

on:
  workflow_dispatch:
  pull_request:

jobs:
  update-tests:
    runs-on: ubuntu-latest
    steps:
      - uses: actions/checkout@v3
      - uses: actions/setup-python@v4
        with:
          python-version: "3.10"
      - run: pip install loadero-python
      - run: python python/src/loadero_python_showcase/run.py
        env:
          LOADERO_ACCESS_TOKEN: ${{ secrets.ACCESS_TOKEN }}
          LOADERO_PROJECT_ID: ${{ secrets.PROJECT_ID }}
          LOADERO_TEST_ID: ${{ secrets.TEST_ID }}
Loadero’s Python client can be used in many different ways and with this blog post we’re just showing some of those to inspire you to use it for your benefit. If you have any questions about Loadero’s Python client, feel free to email us, we’d be happy to help you.


